Guide CSV Channel
Navigate to xyxle Dashboard.
In order to create a new CSV Channel you will need to also establish connections to a relevant partner.
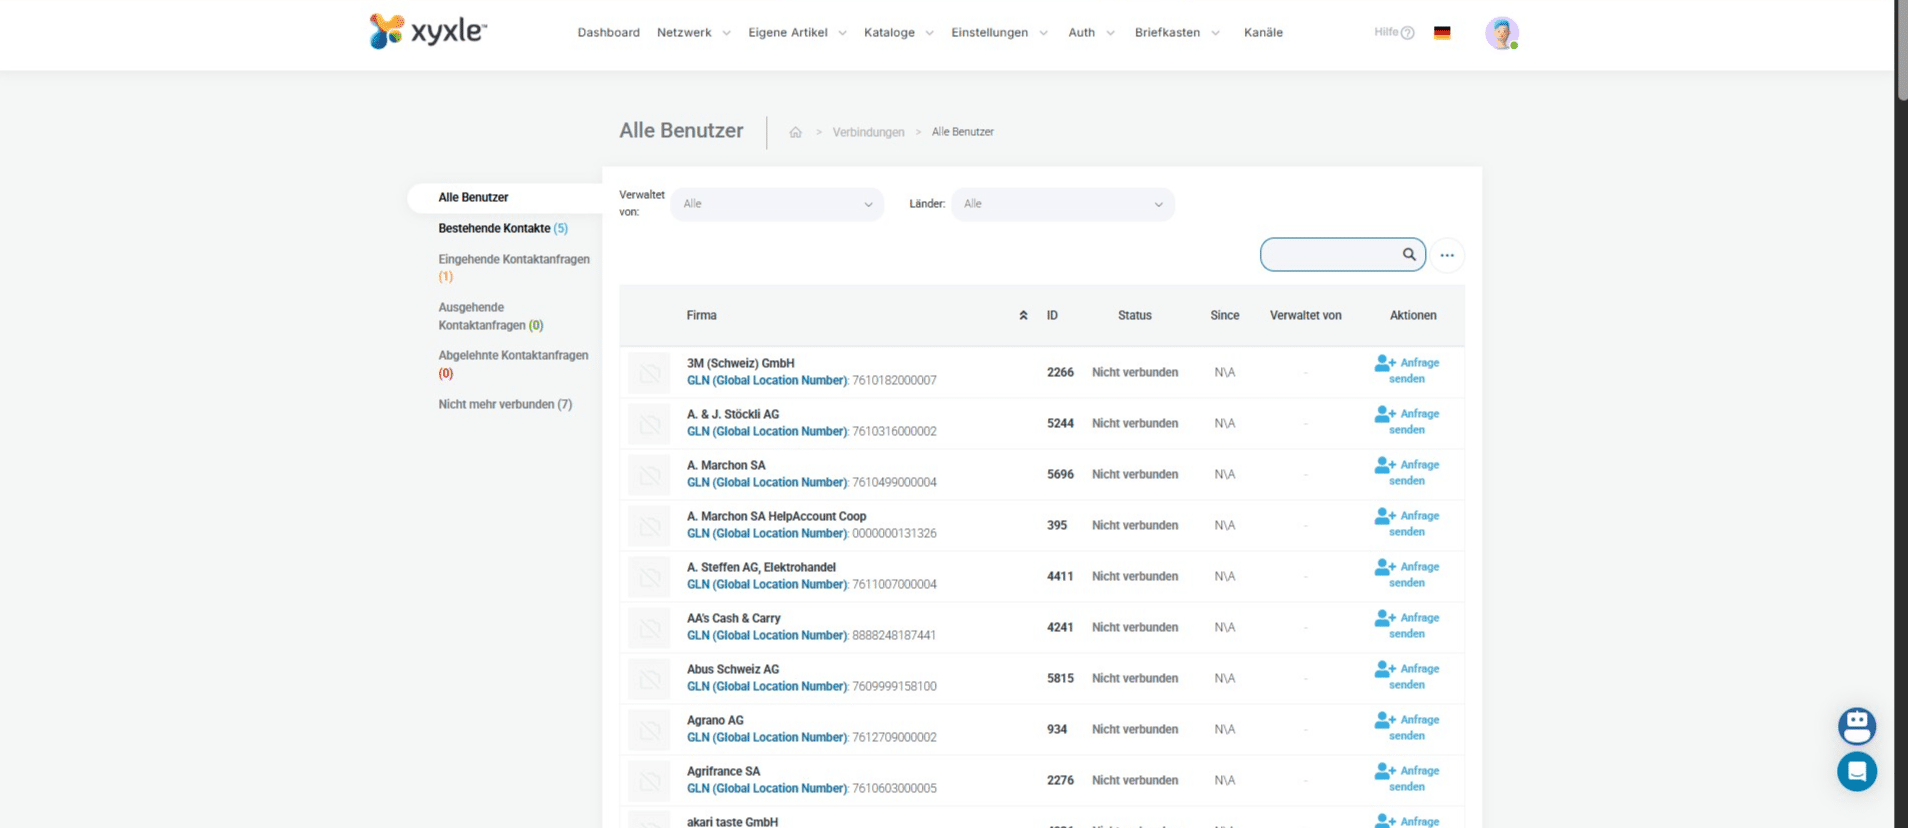
Click on "Alle Verbindungen" to go to the Network section and here you will find all available partners in xyxle.

Click here to search for a specific partner

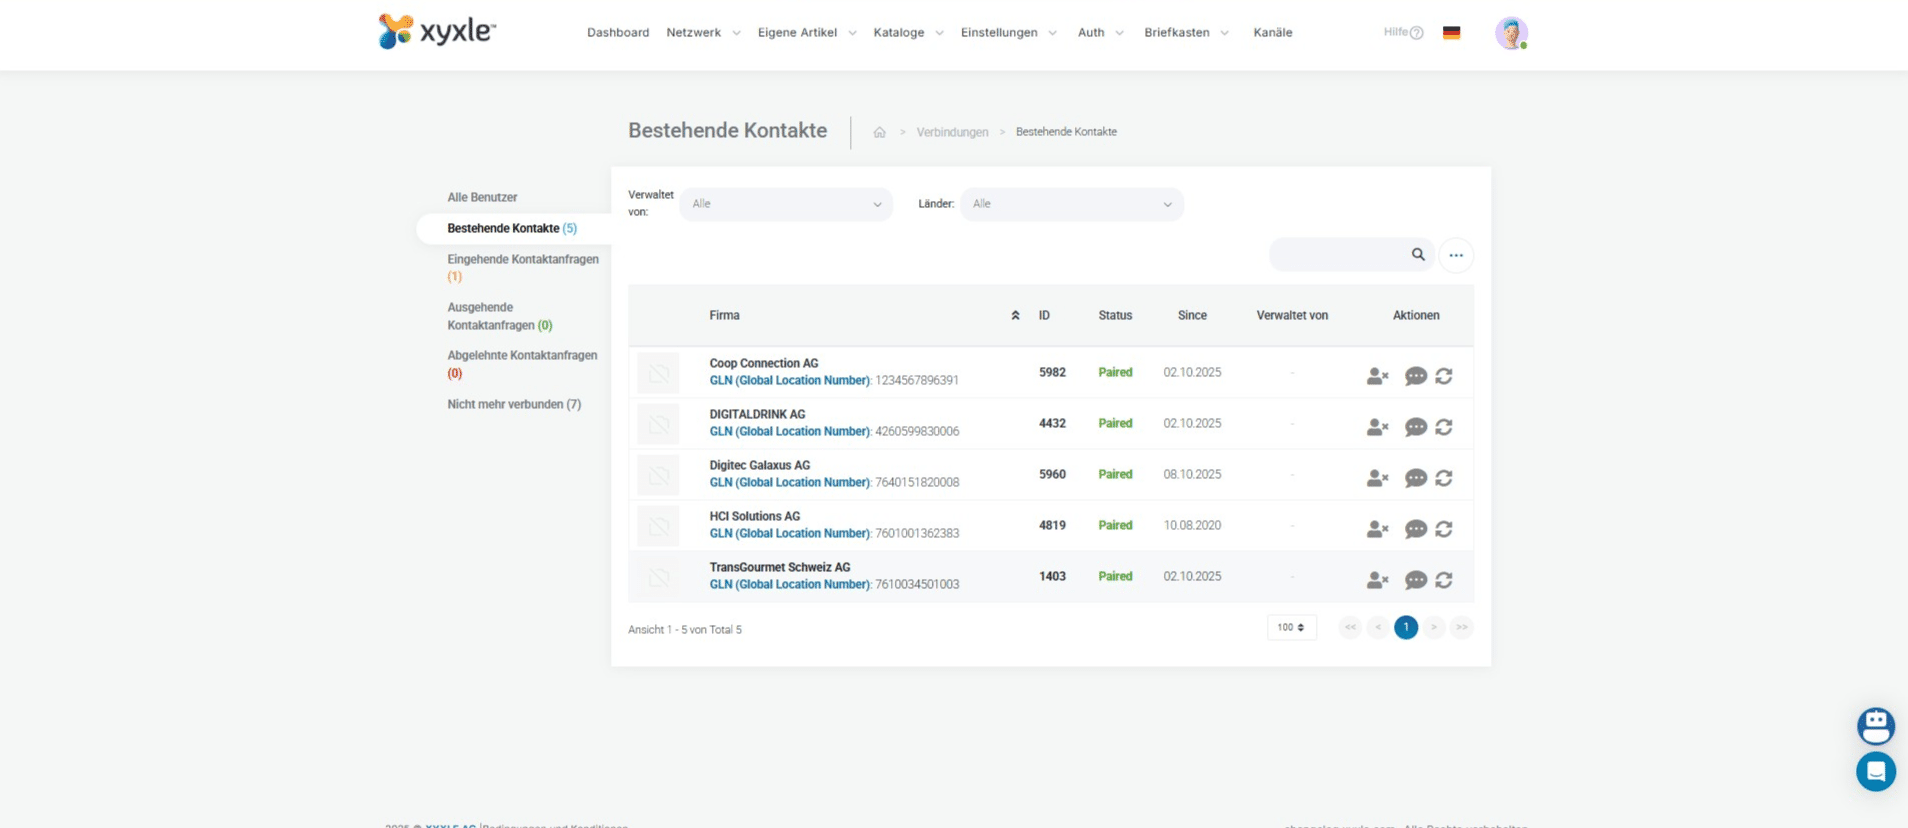
Click on "Bestehende Kontakte" to see established contacts.
For this account we can see we already have connections, which we will use in our examples.
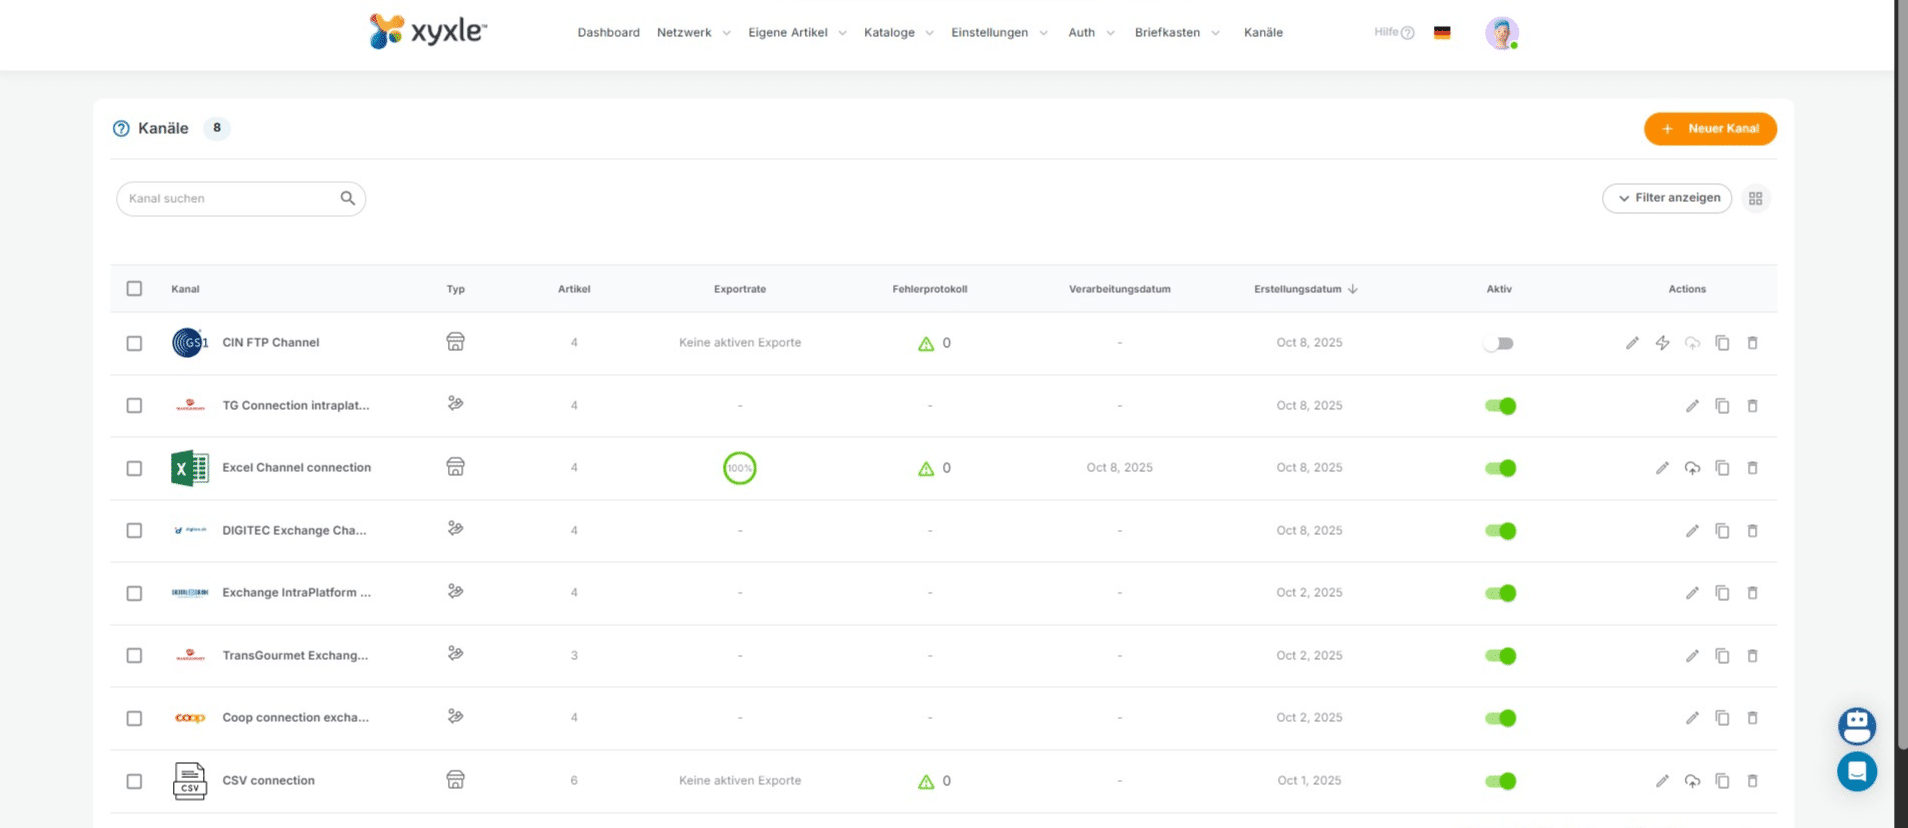
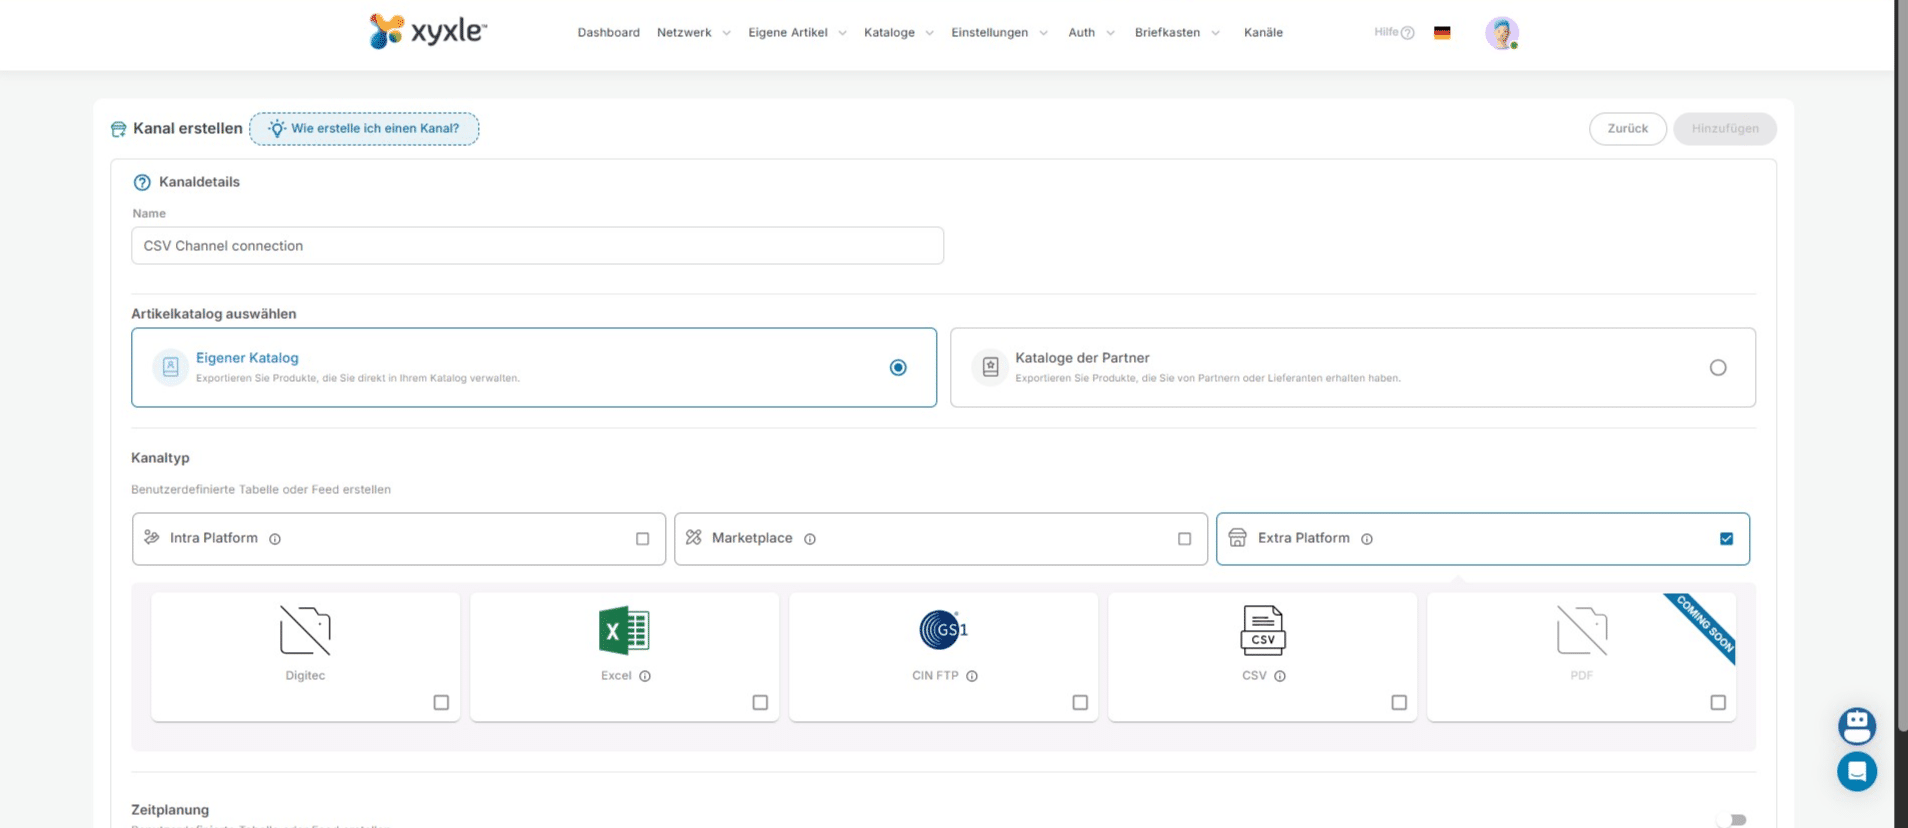
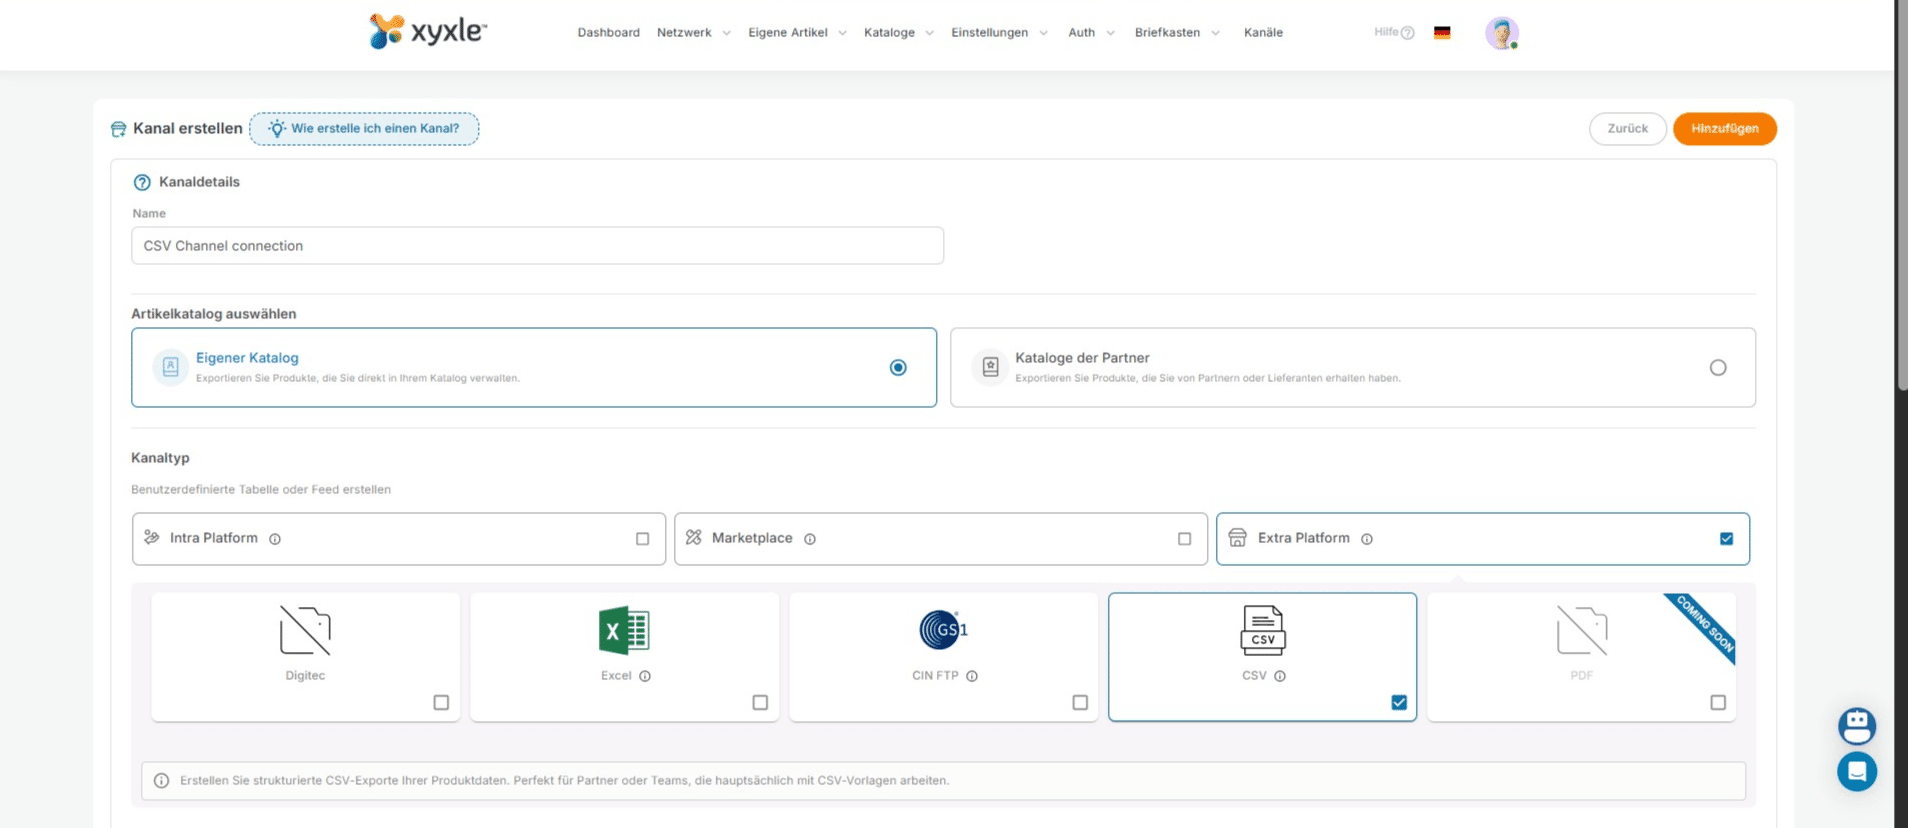
Click on "Kanäle".

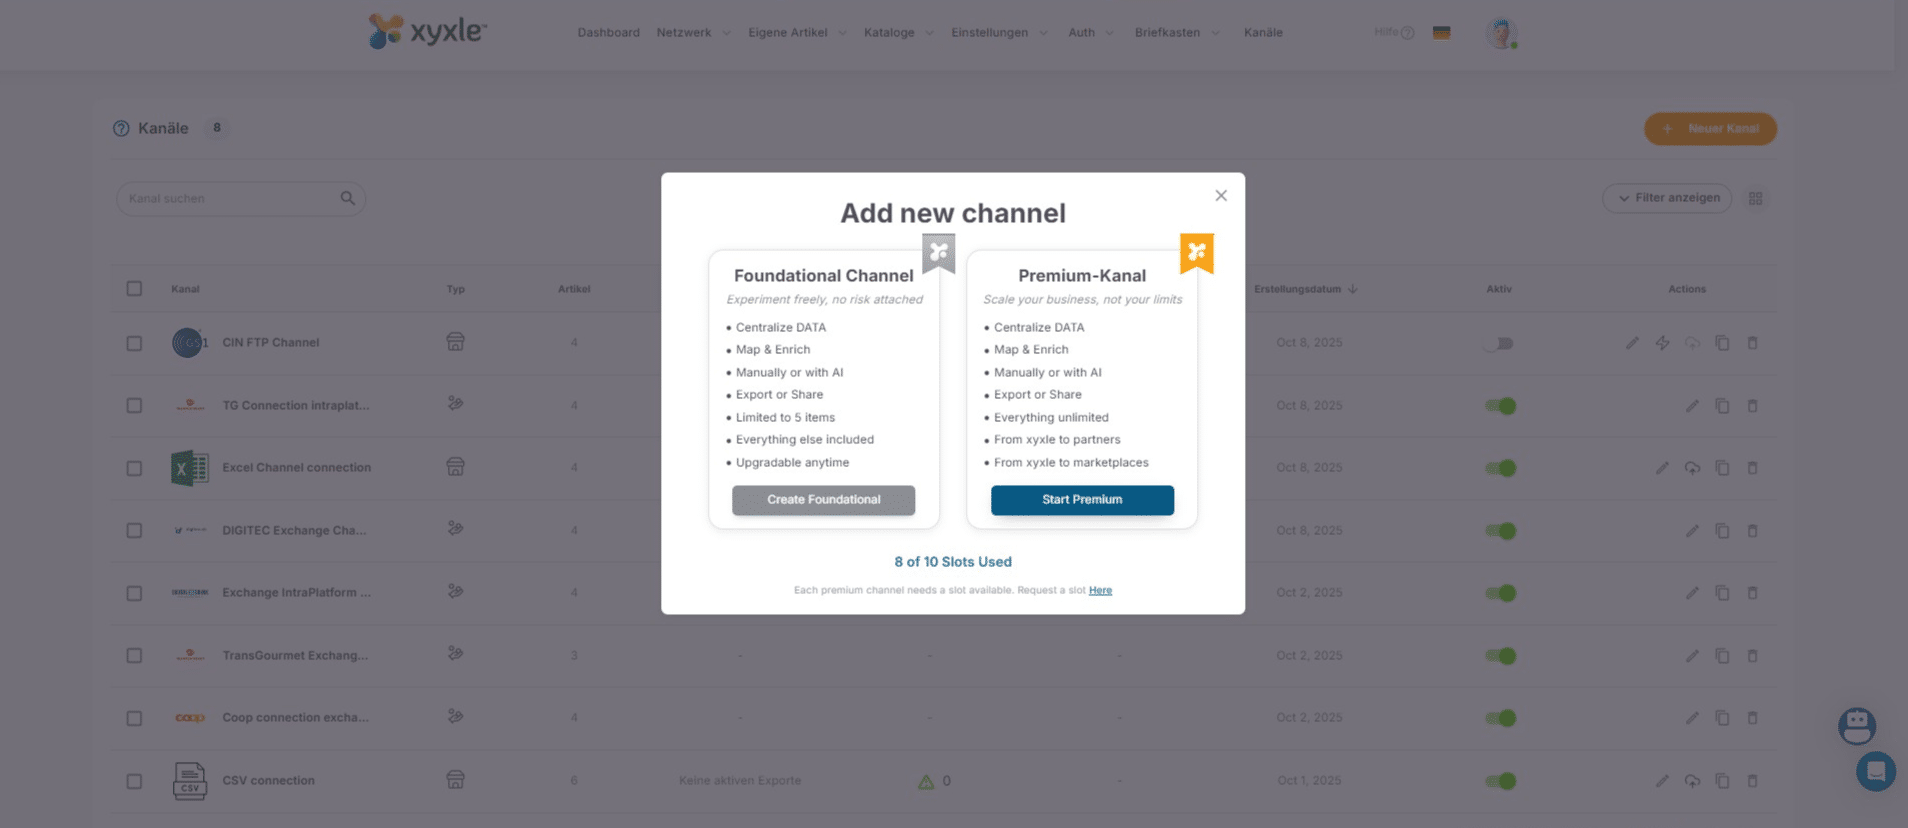
Click Neuer Kanal to create a new channel.
Click on "Start Premium" if you already have a premium subscription, if not please contact a xyxle representative.
Click here to add a new name for your new channel.
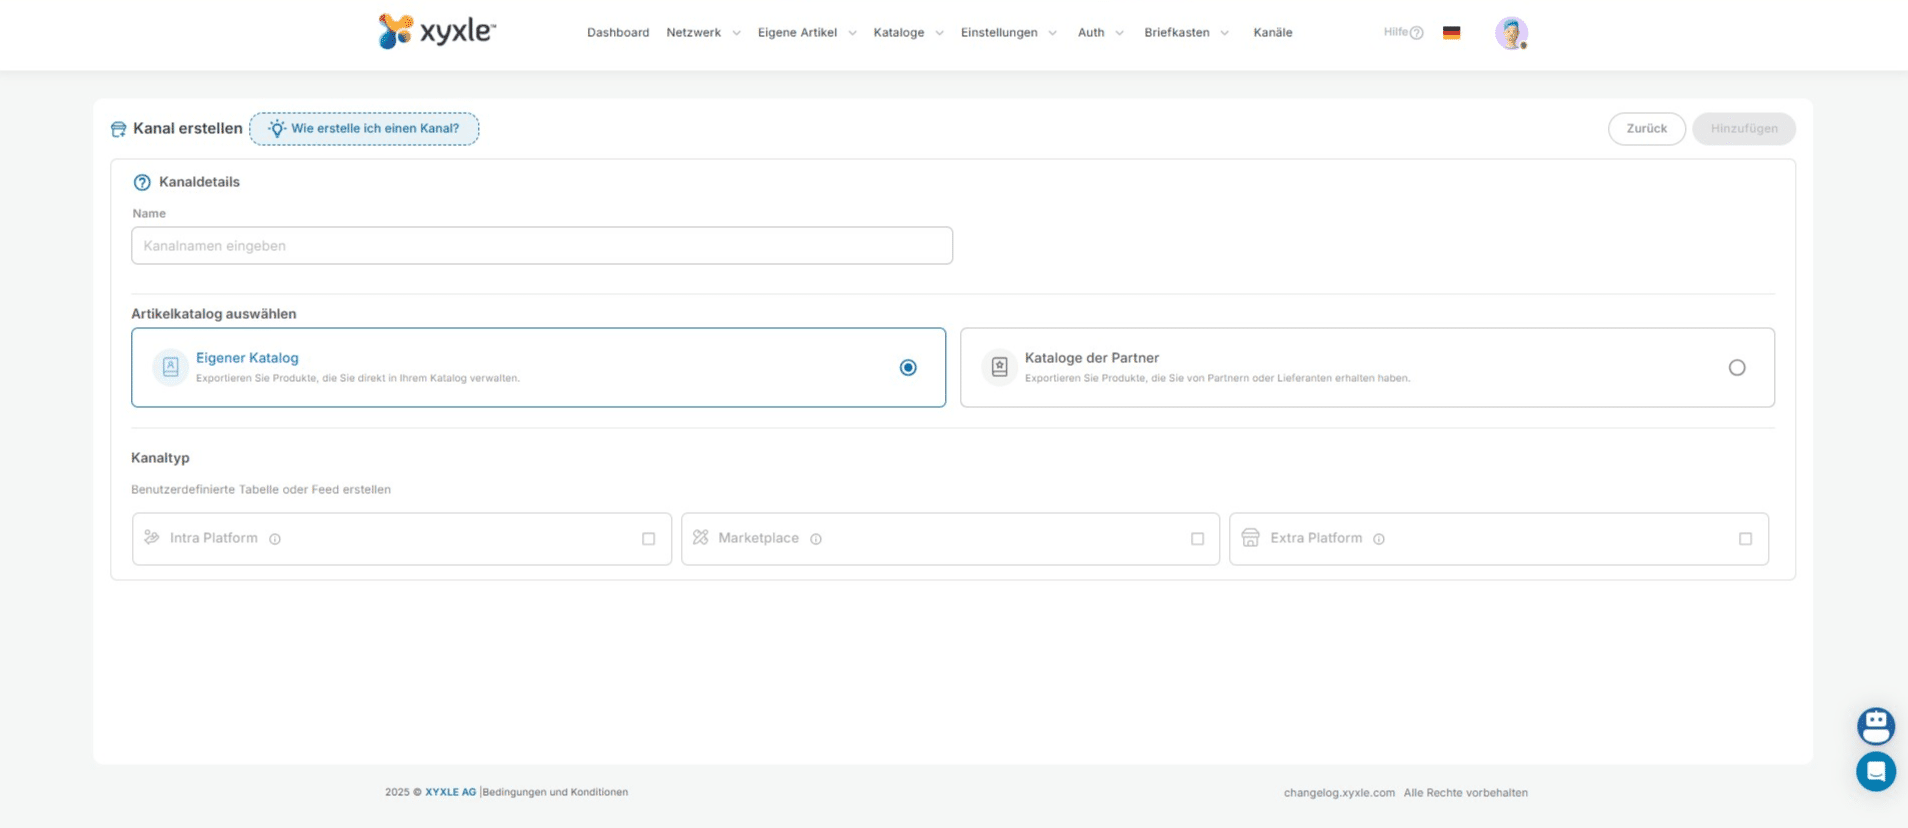
Click on Extra Platform.
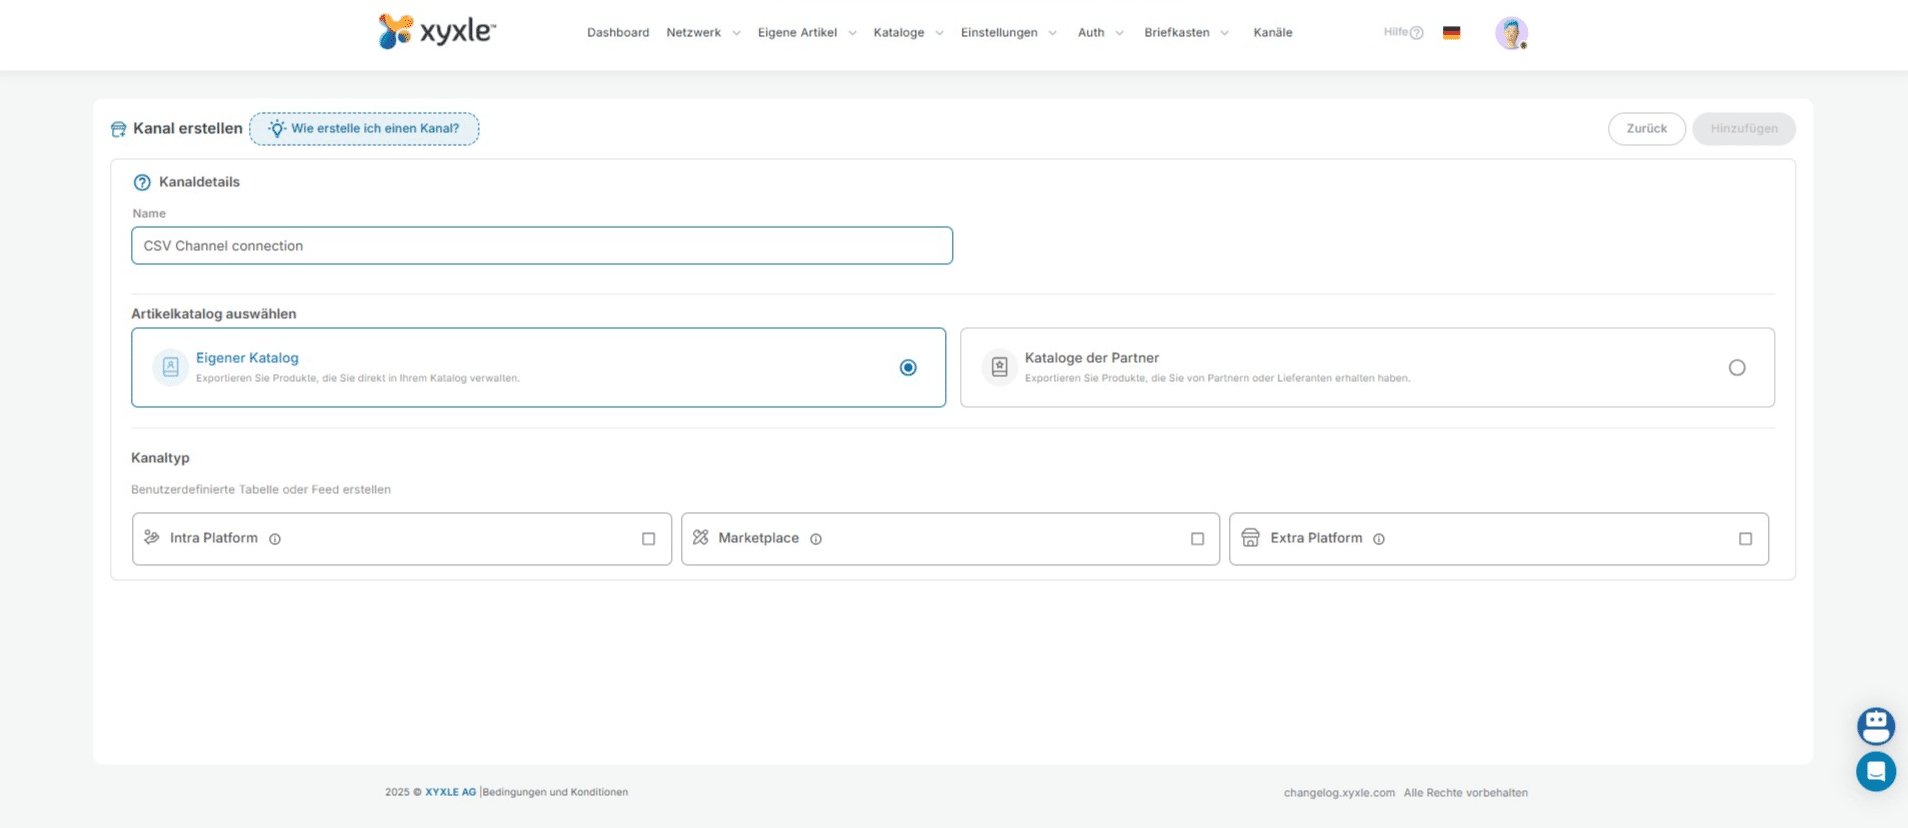
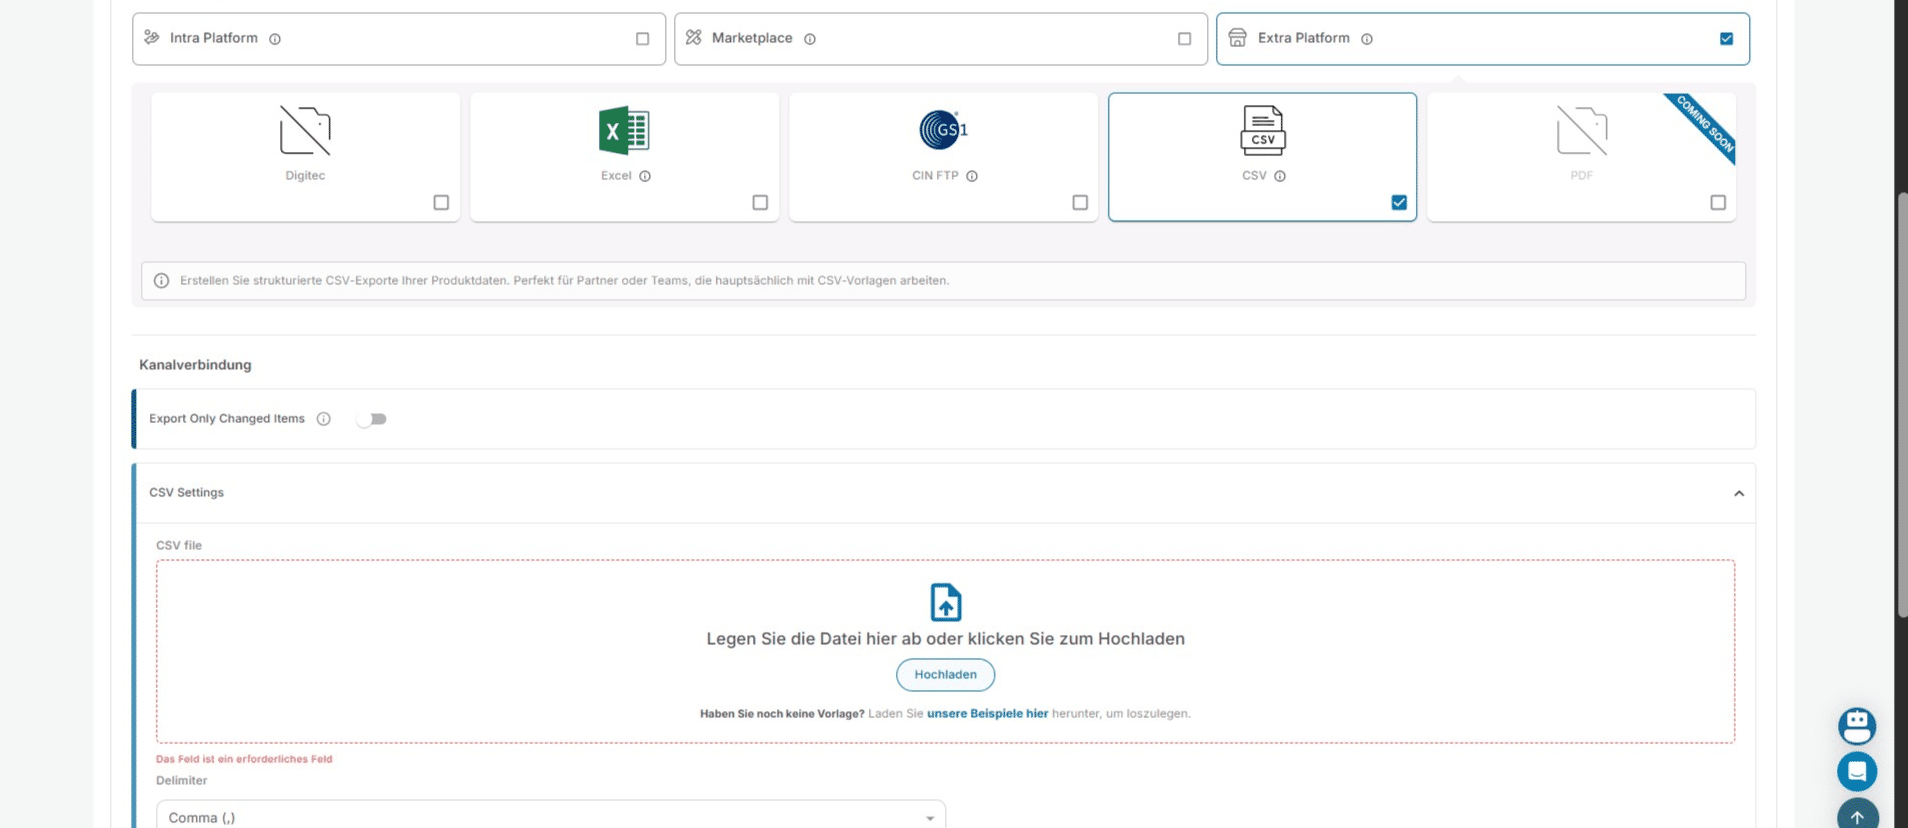
Click on "CSV"
Click on "unsere Beispiele hier" if you don't have an CSV File already. From here you can download an example so you can better see what this needs to contain.
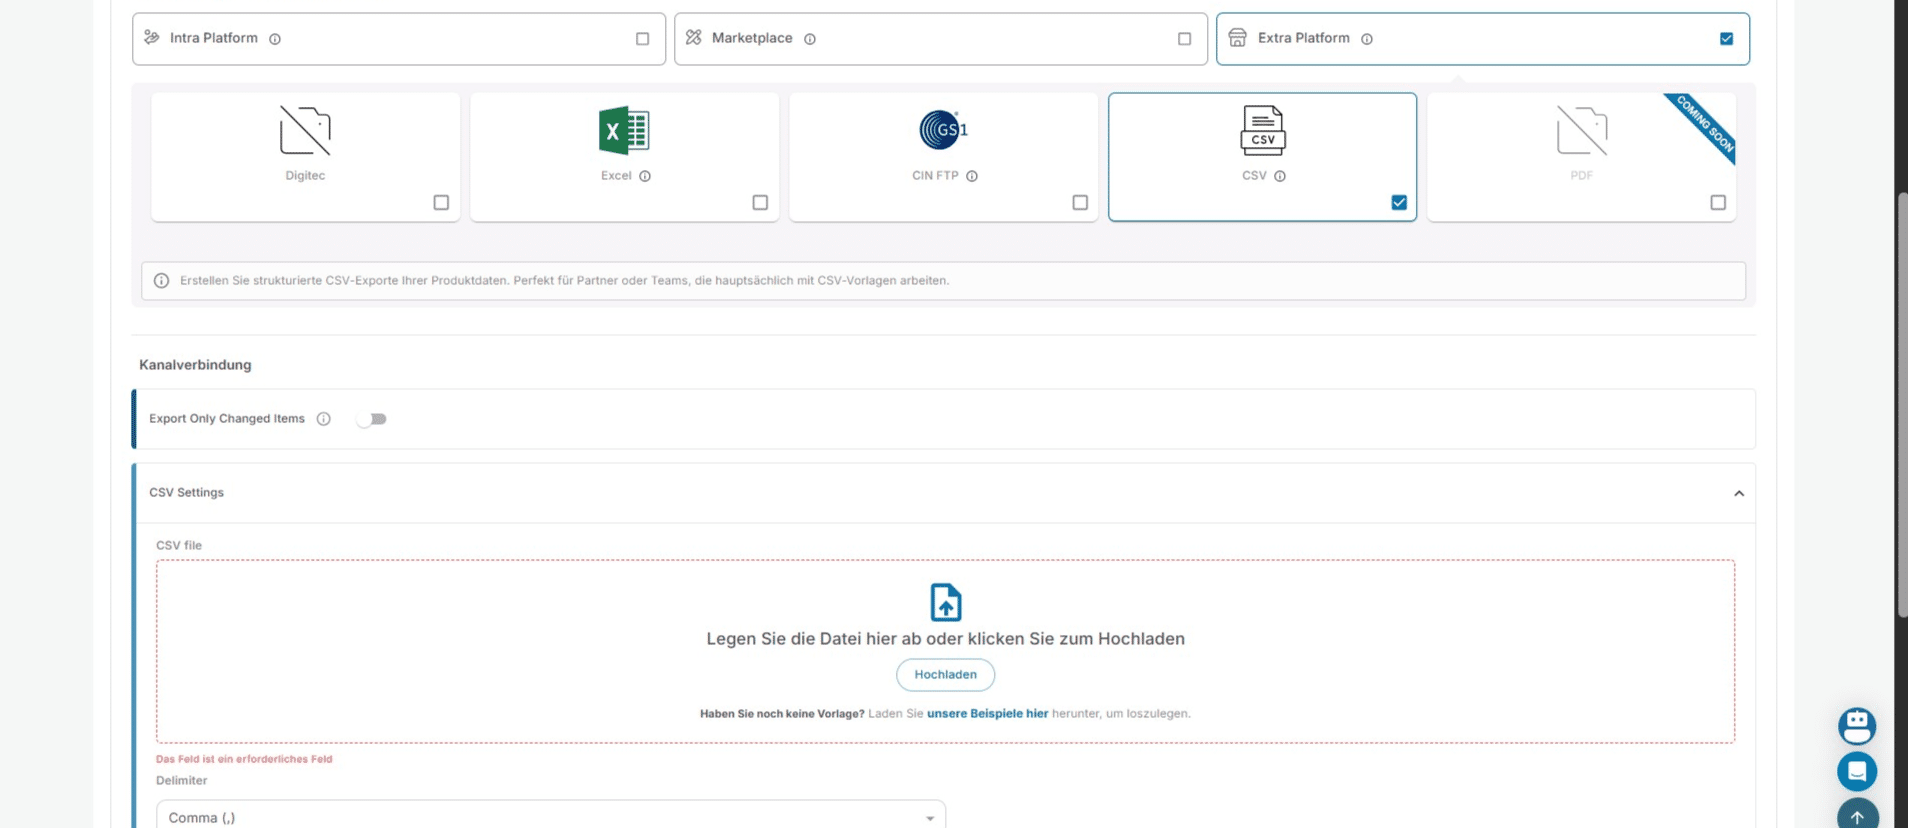
From here you can also modify these 3 options.
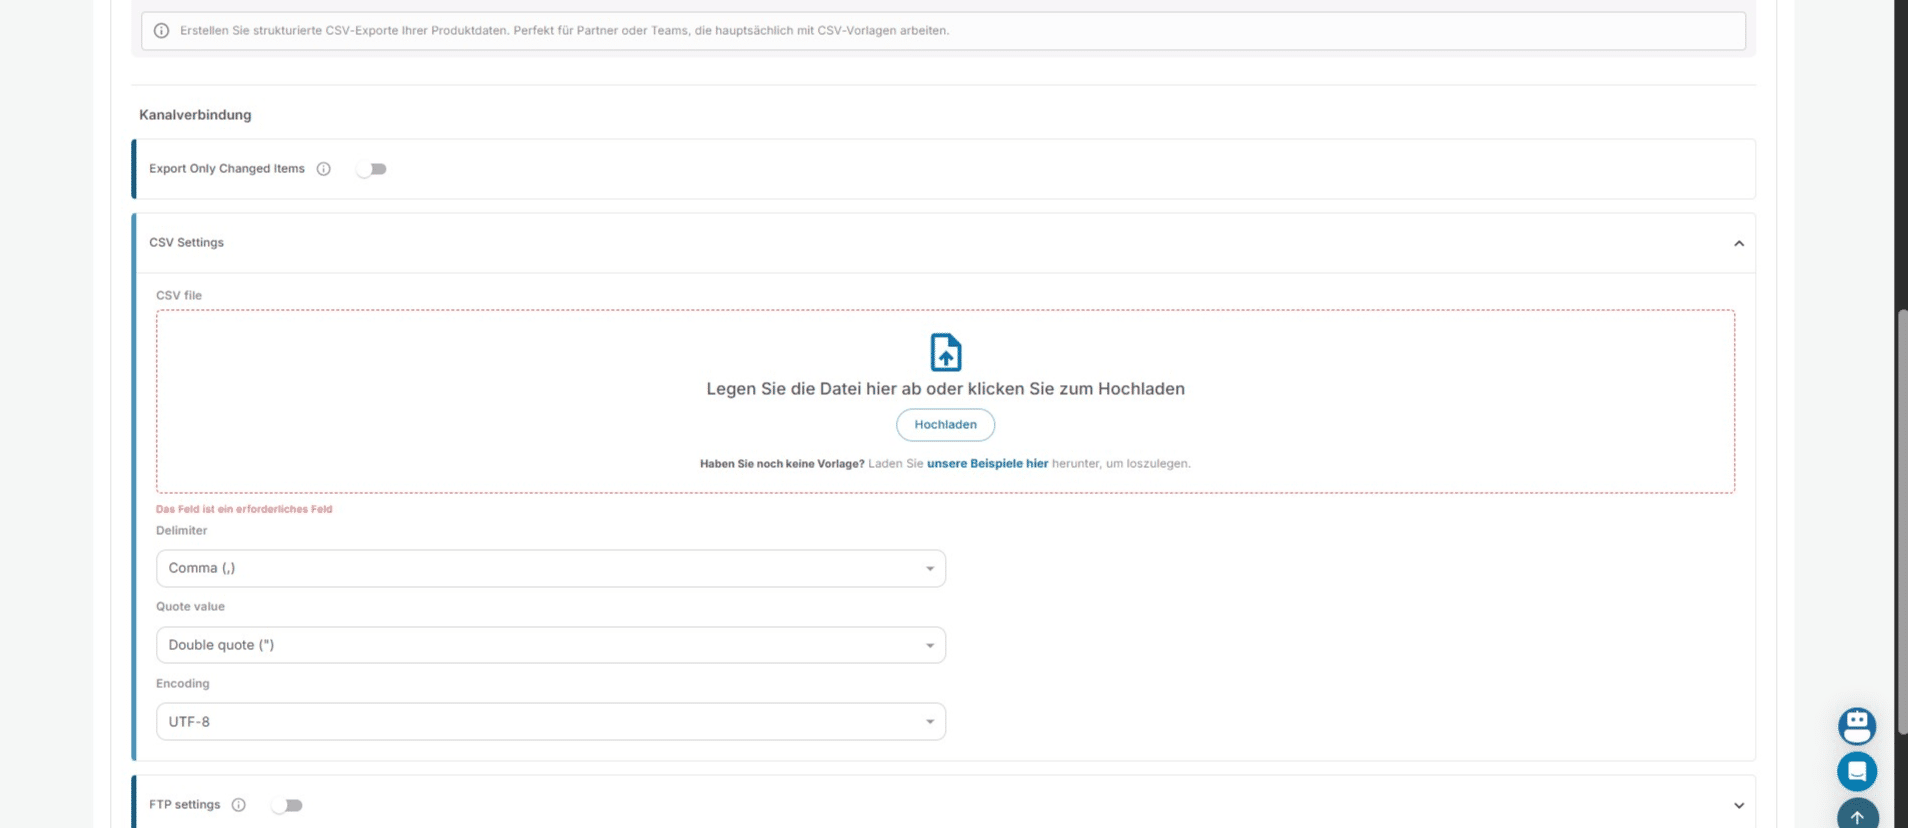
Click on "Hochladen" to upload the CSV file after you have modified it to your needs.
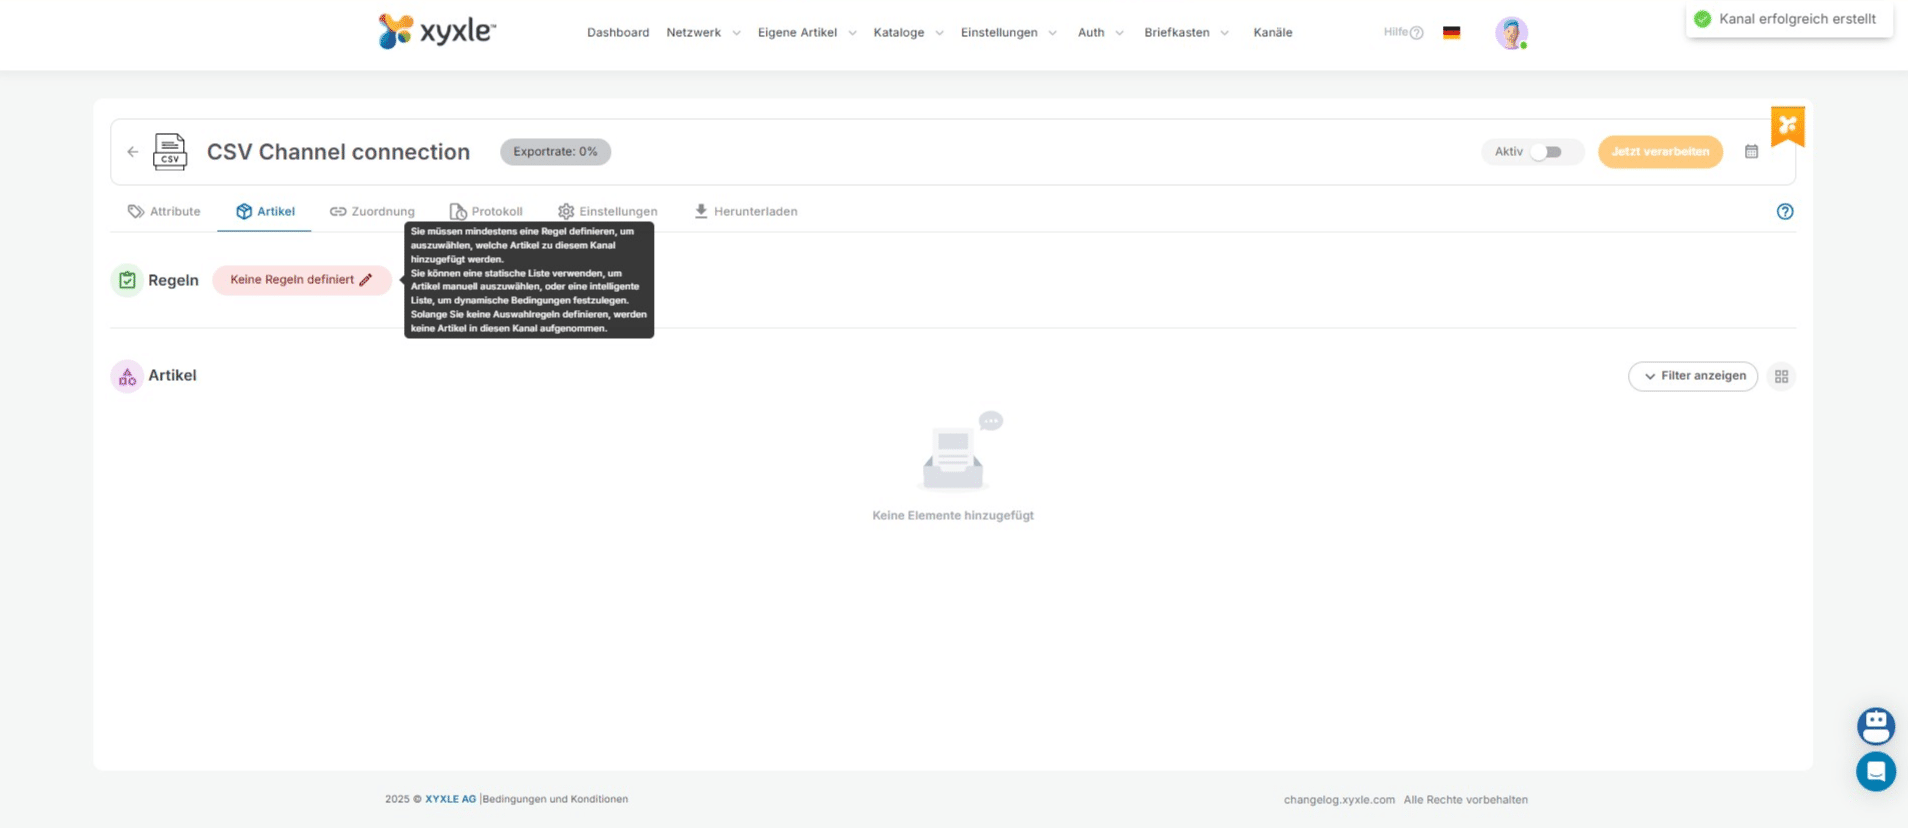
Click on "Hinzufügen"
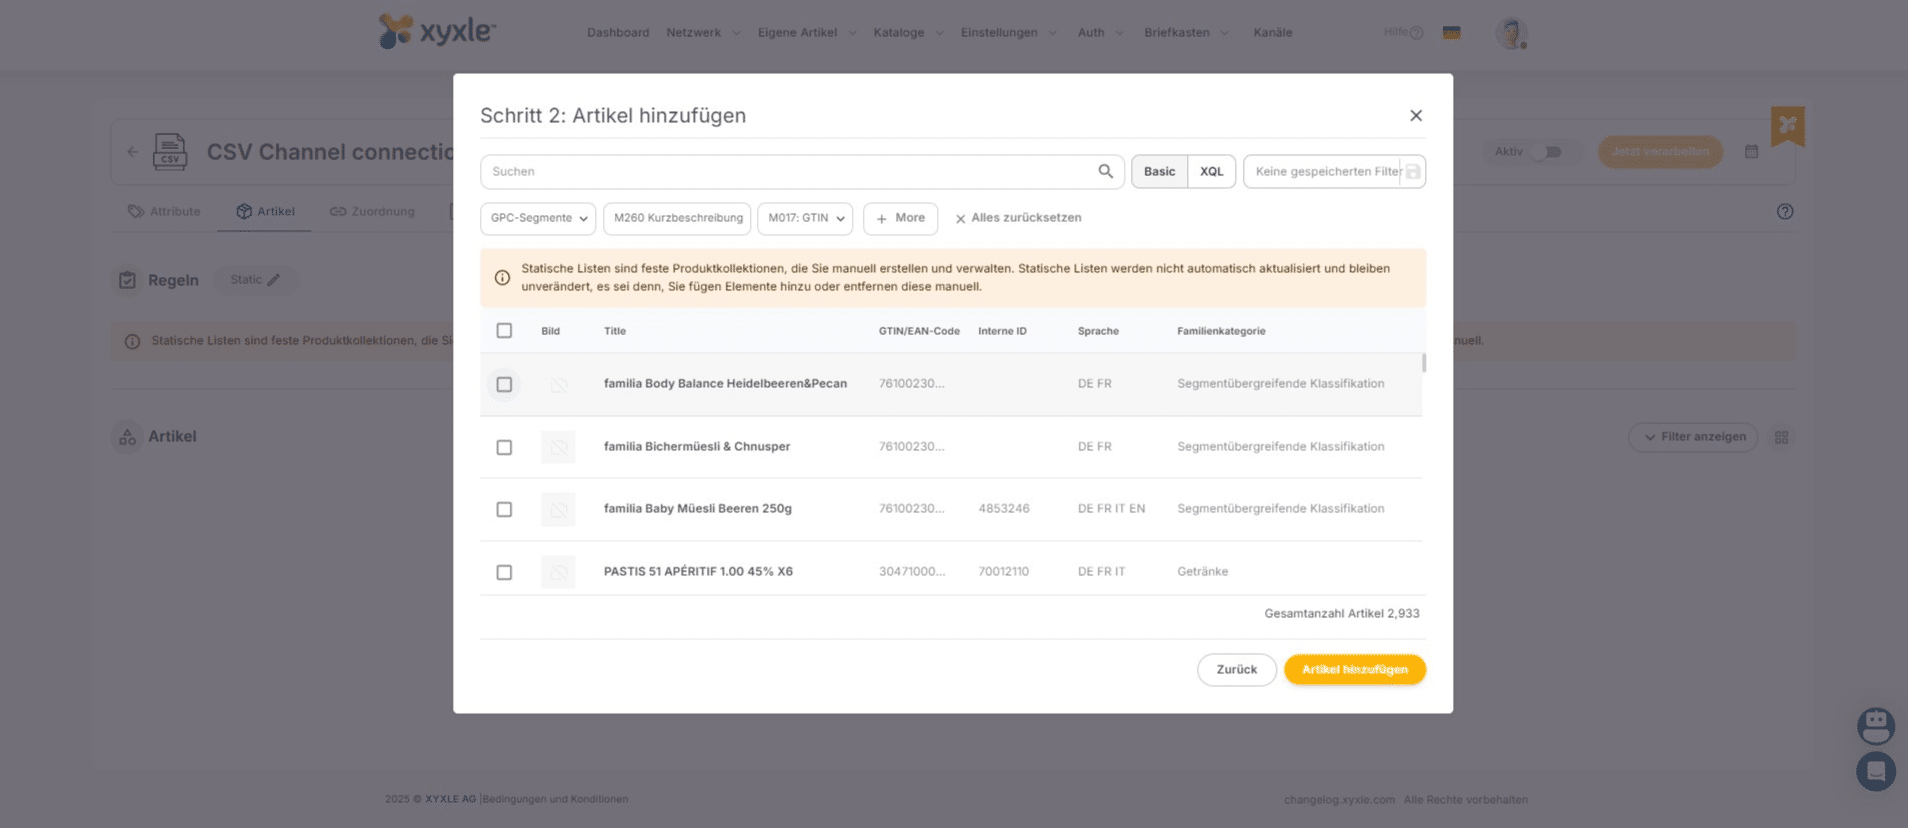
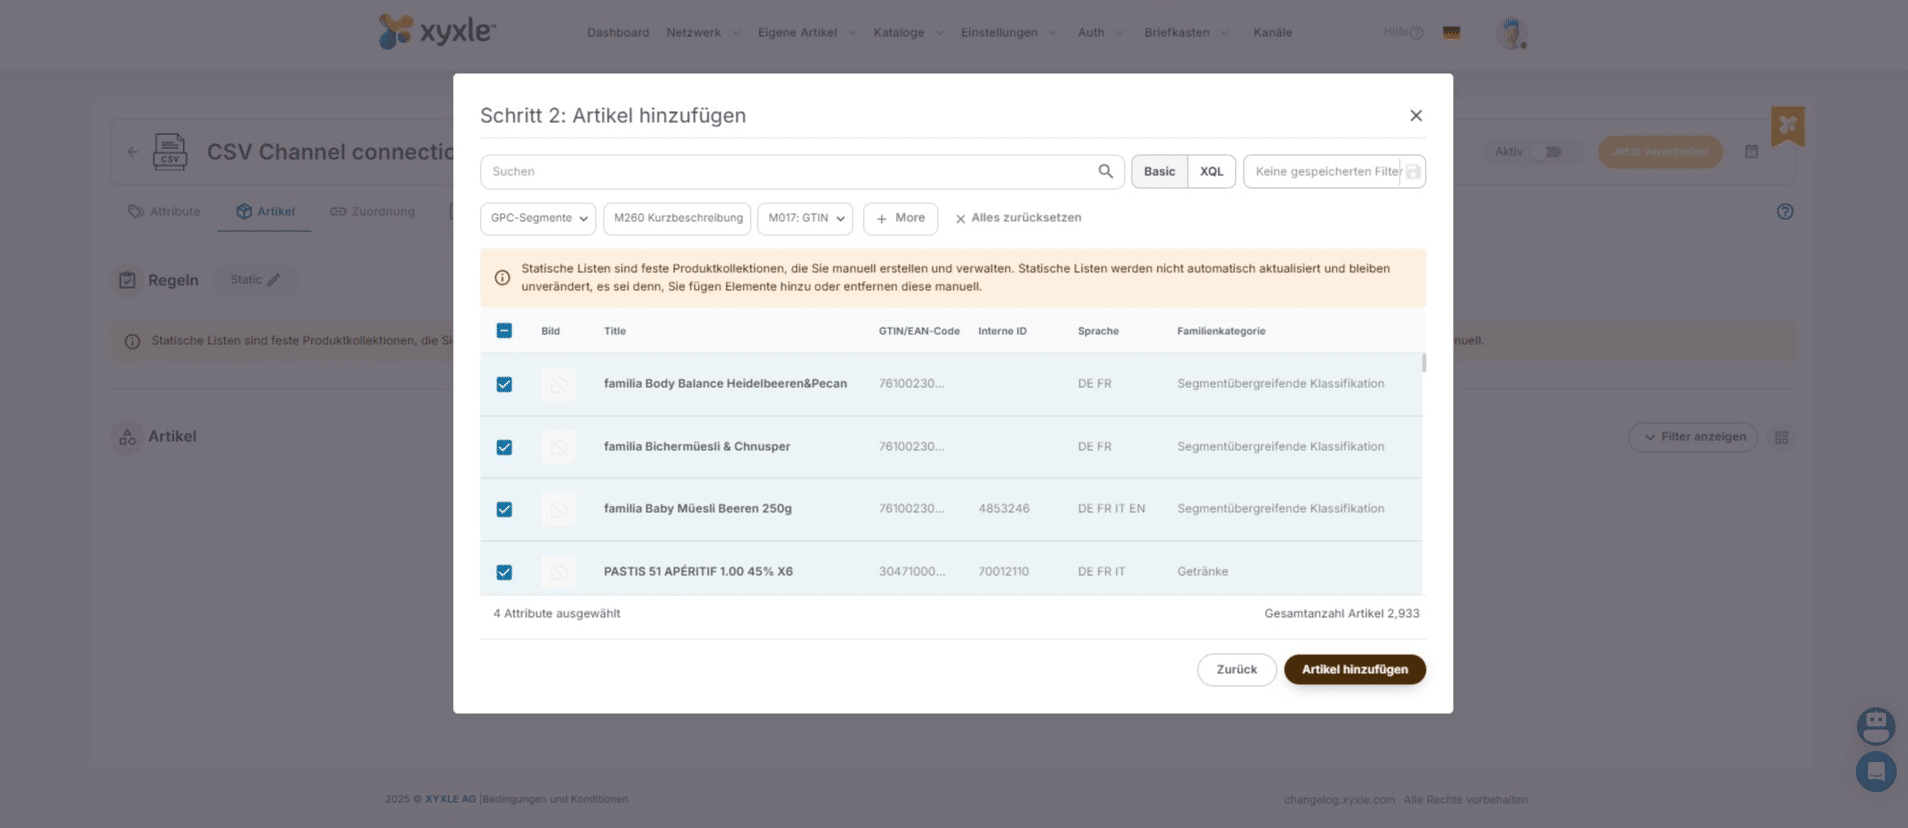
Click on "Keine Regeln definiert" to add new articles.
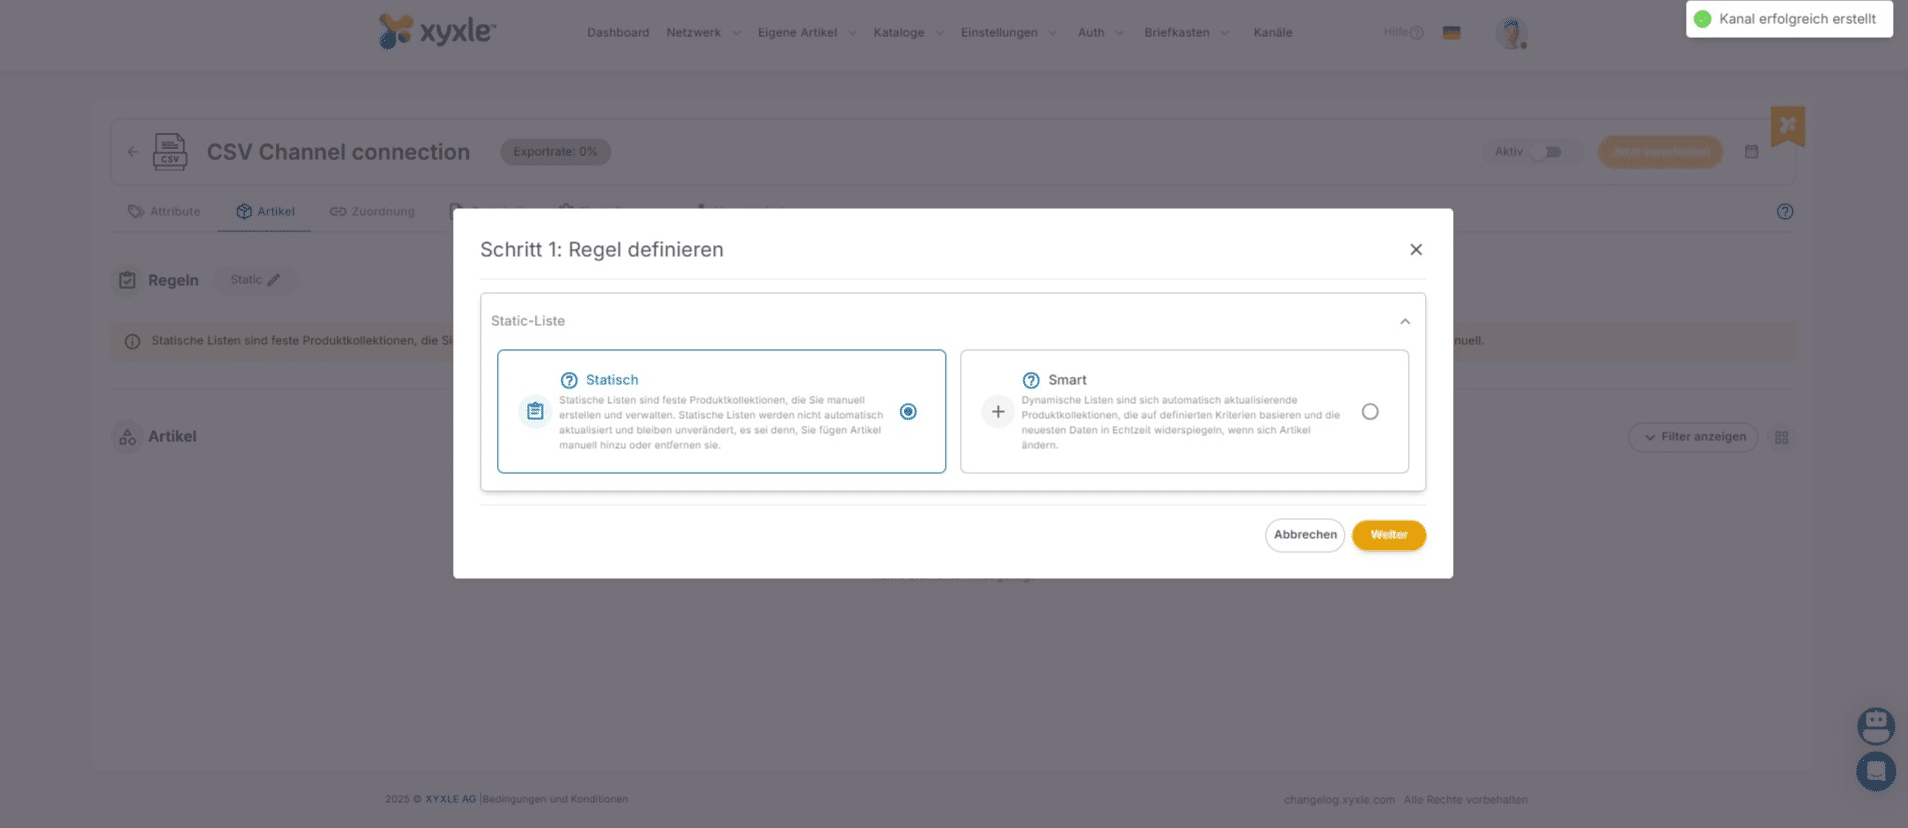
Click on Static or Smart, depending on your needs. For this example we will use Static.
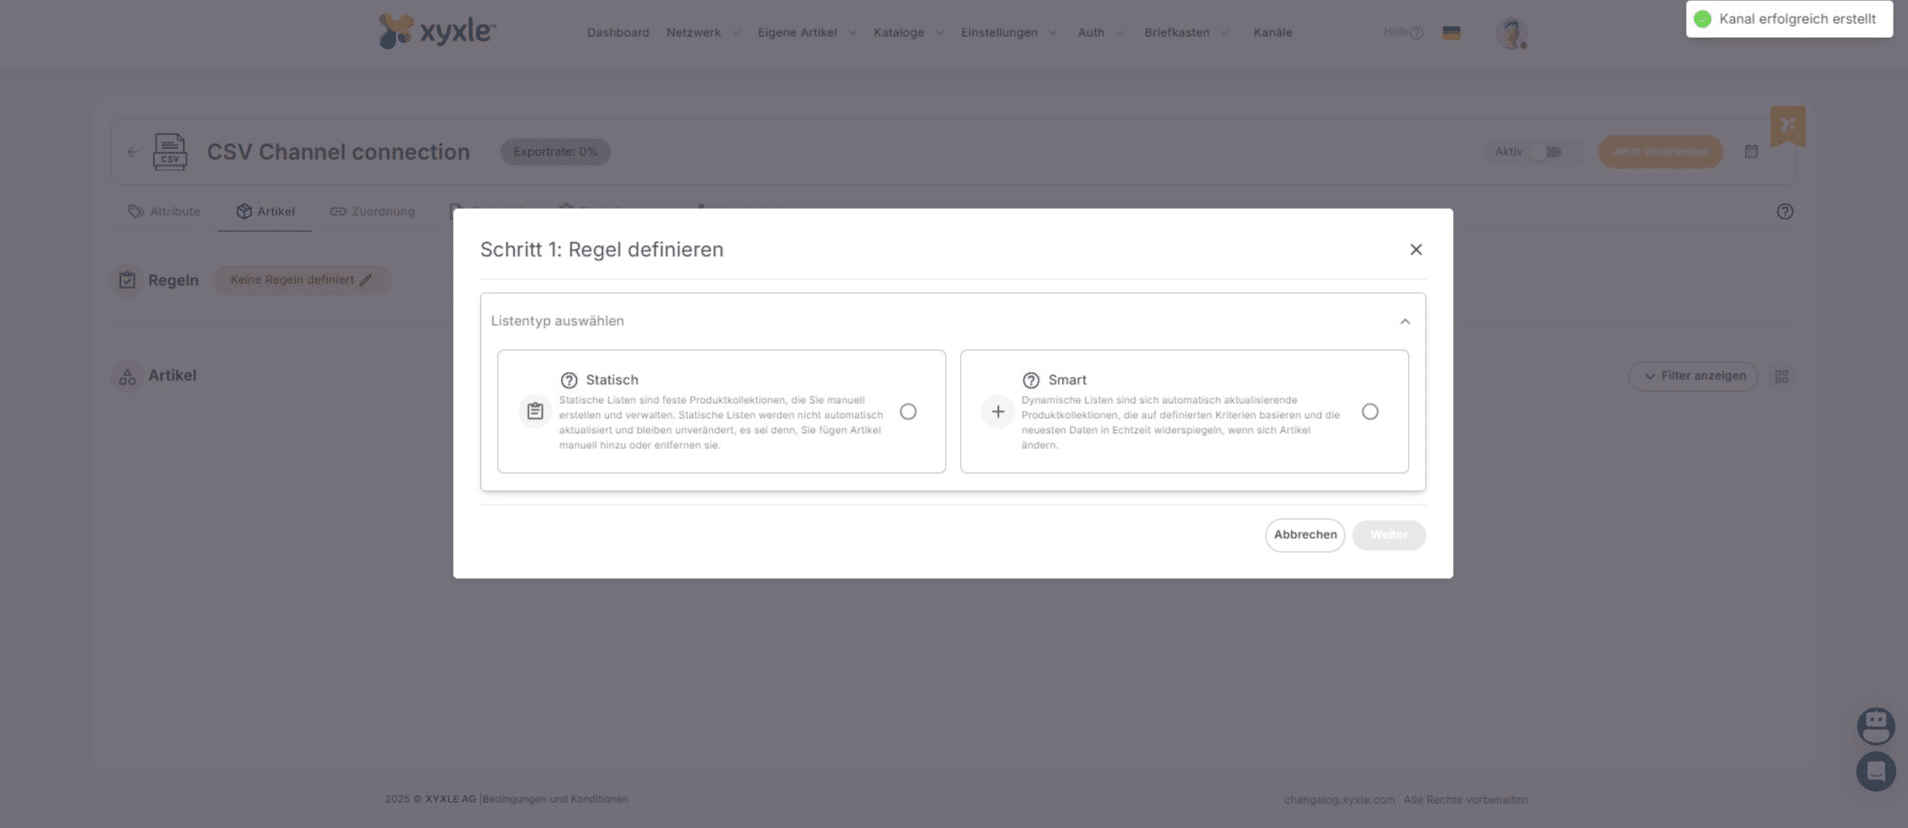
Click on "Weiter"
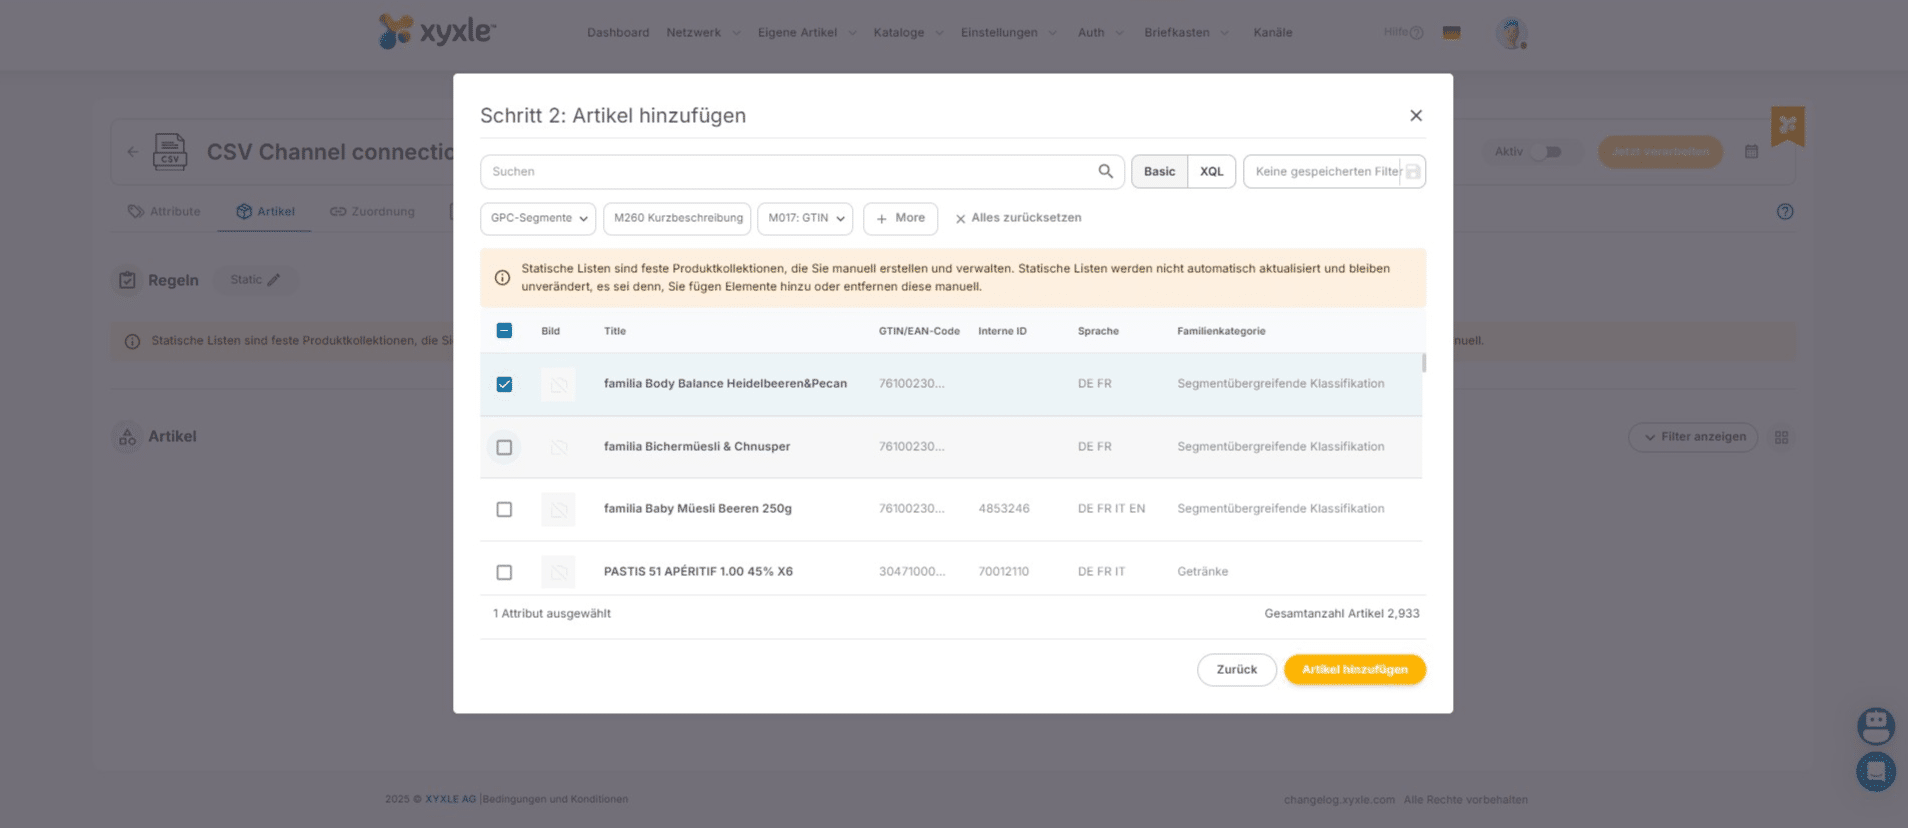
Click here to select an article.
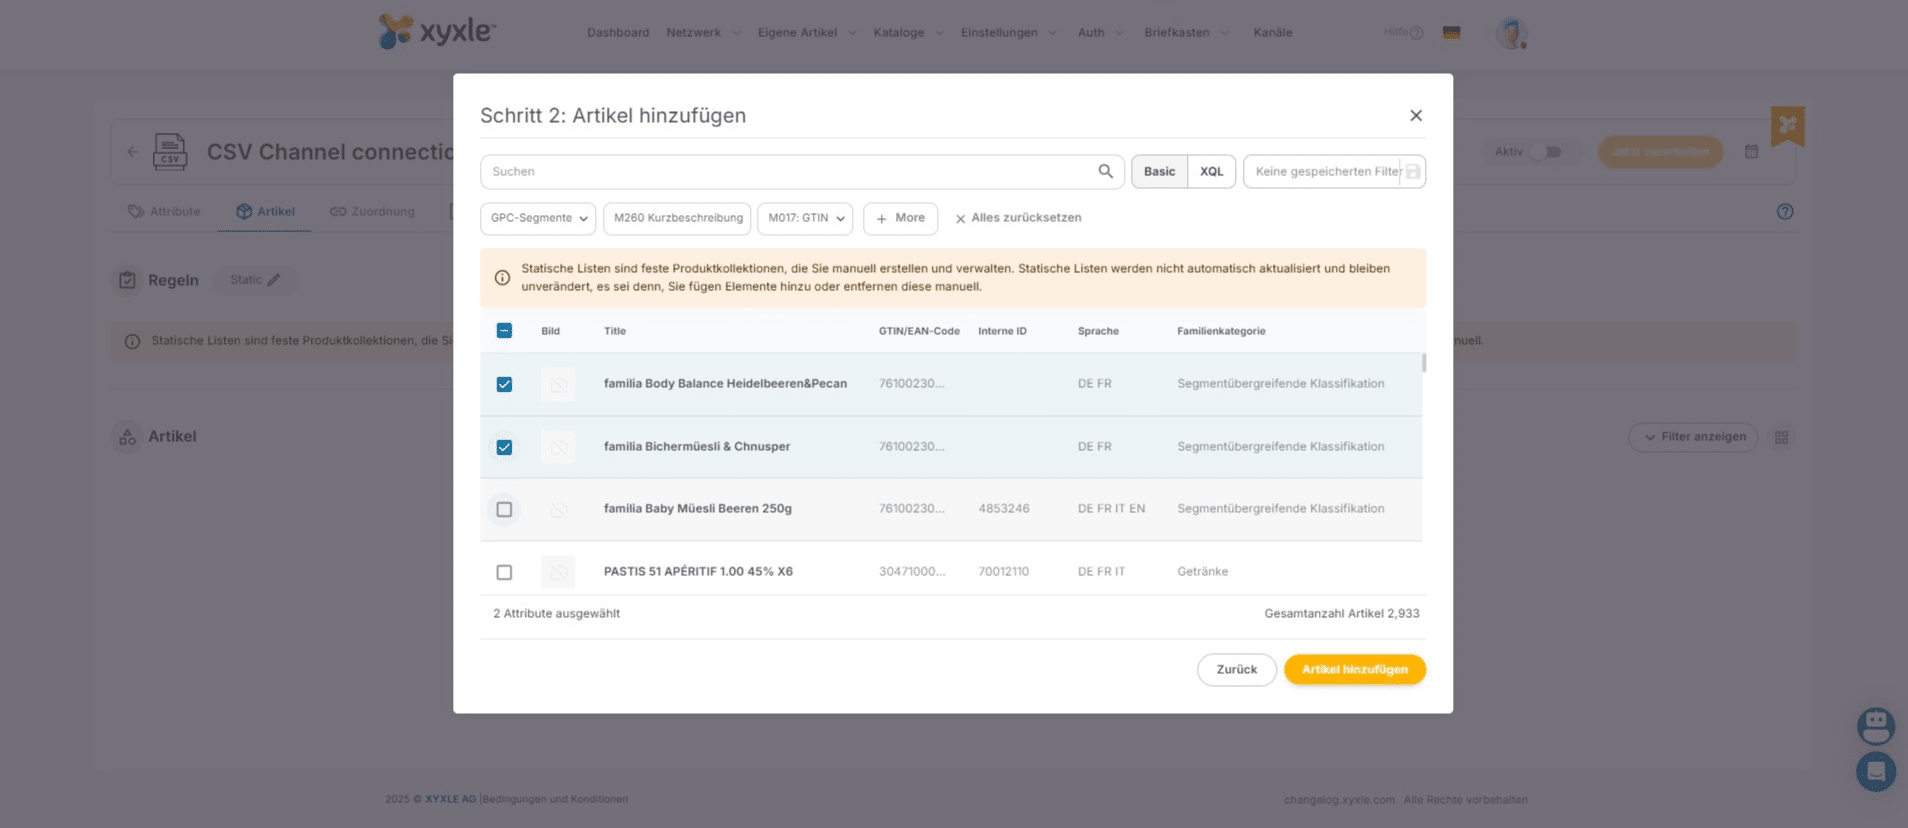
Click here to select an article.
Click here to select an article.
Click here to select an article.
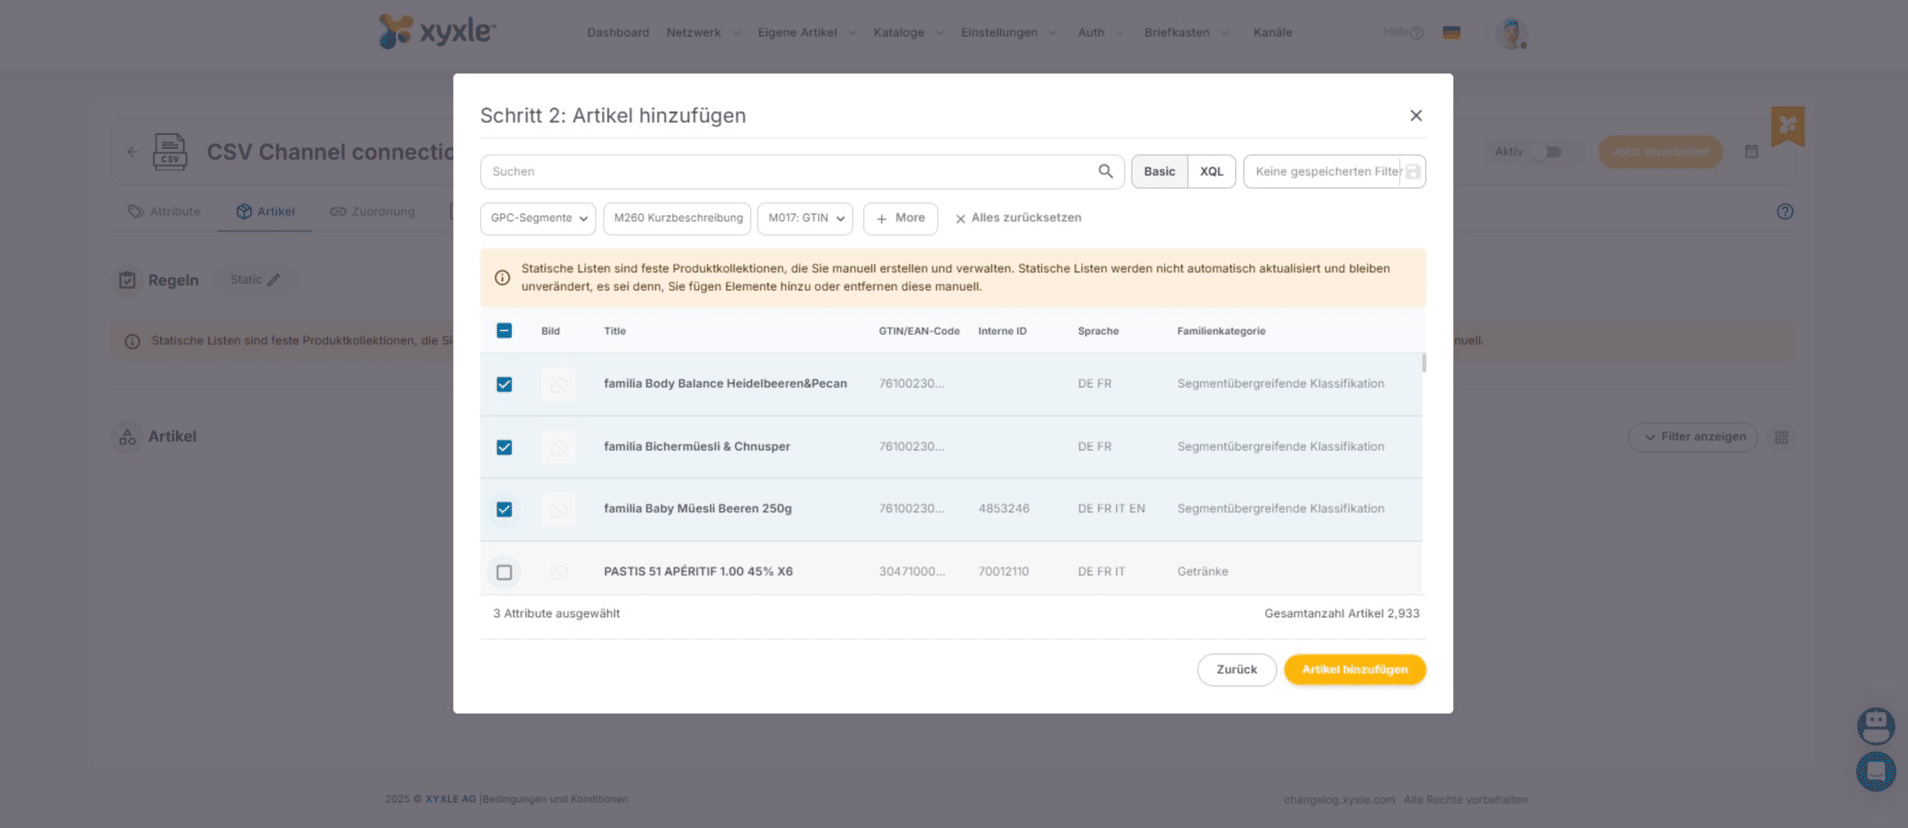
Click on "Artikel hinzufügen"
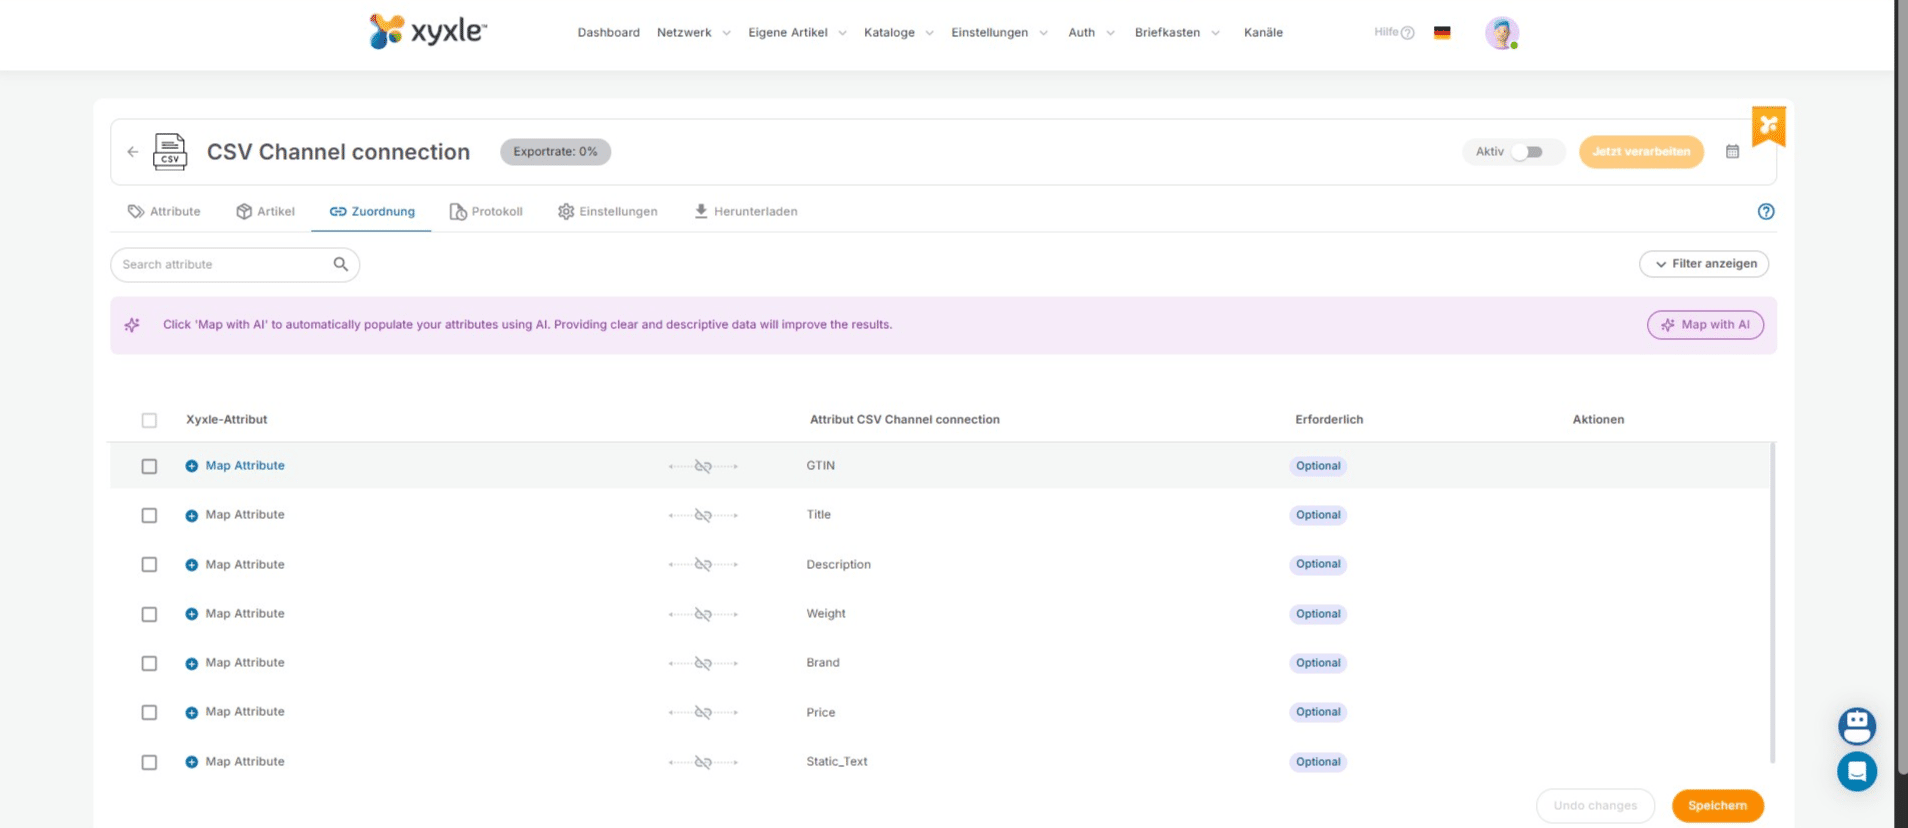
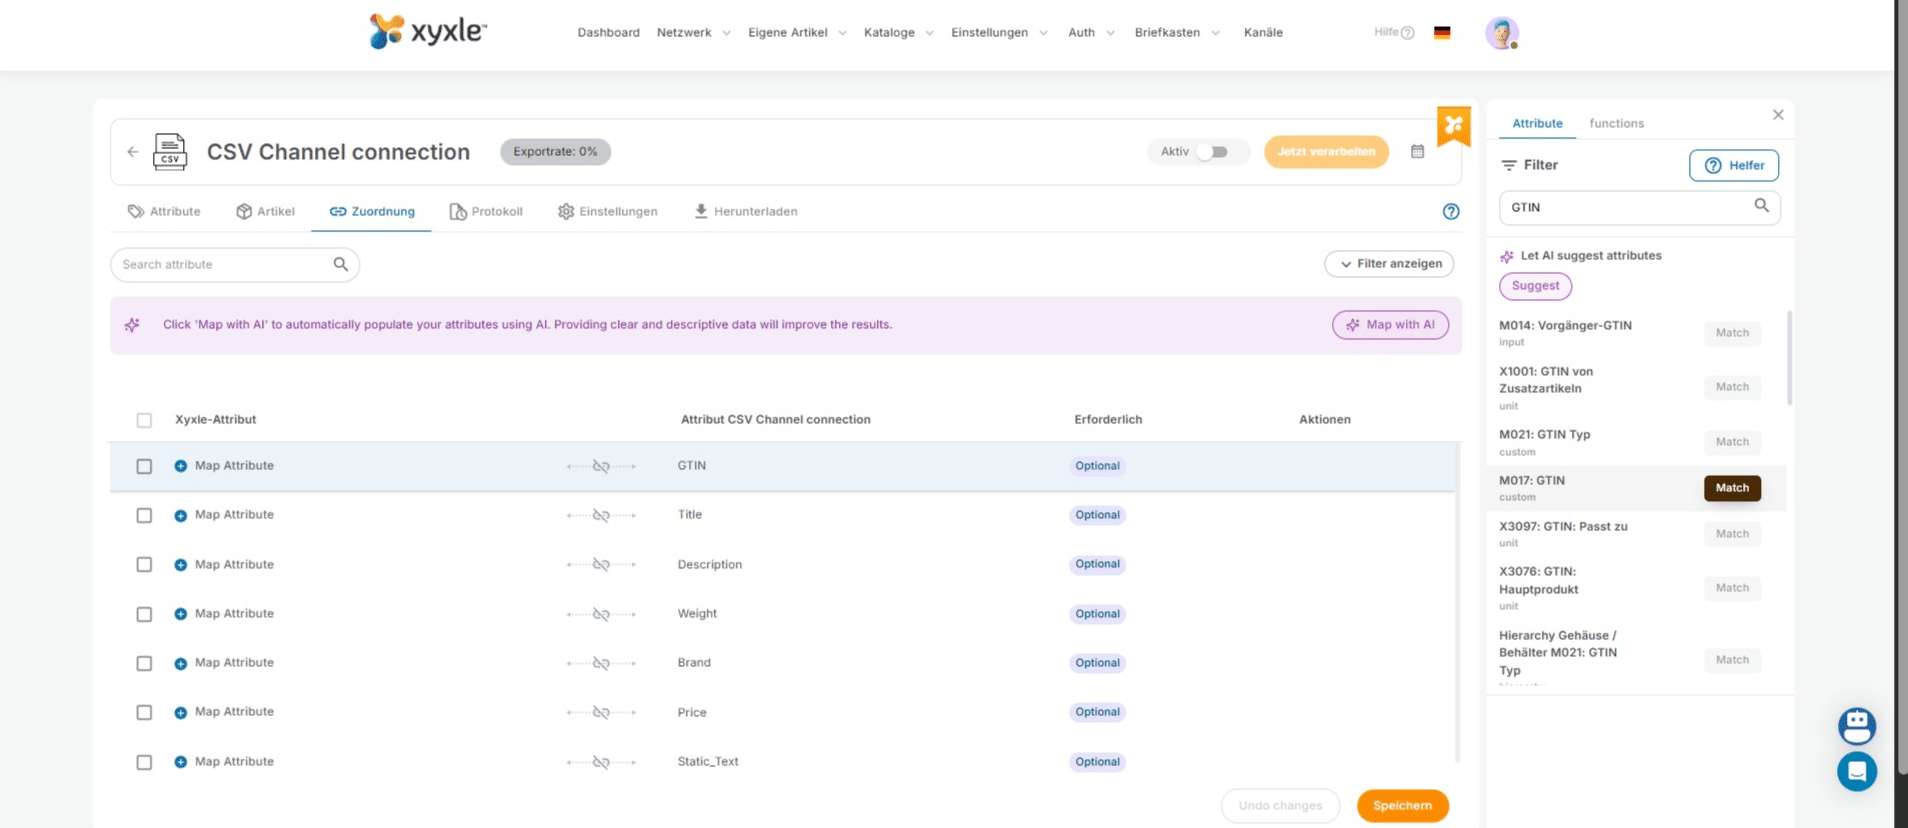
Click here to mapp the attributes.
Click here to mapp the attributes manually.
Click here to search your desired attribute.
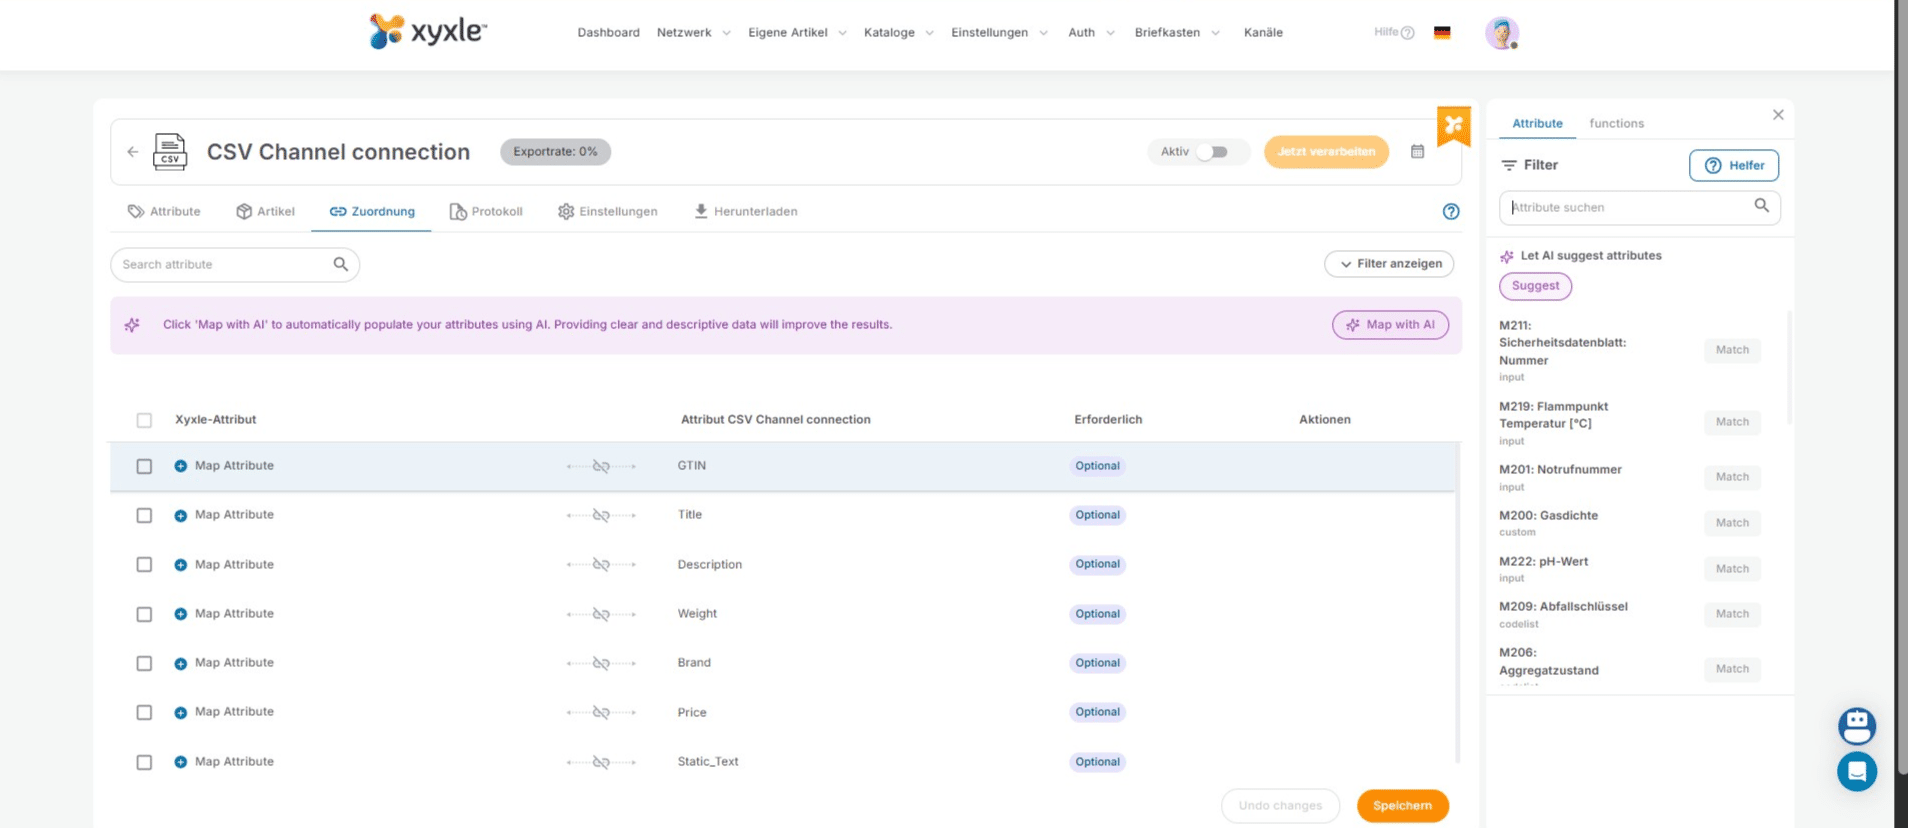
Click on "Match"
Click this icon to exit the manual selection.
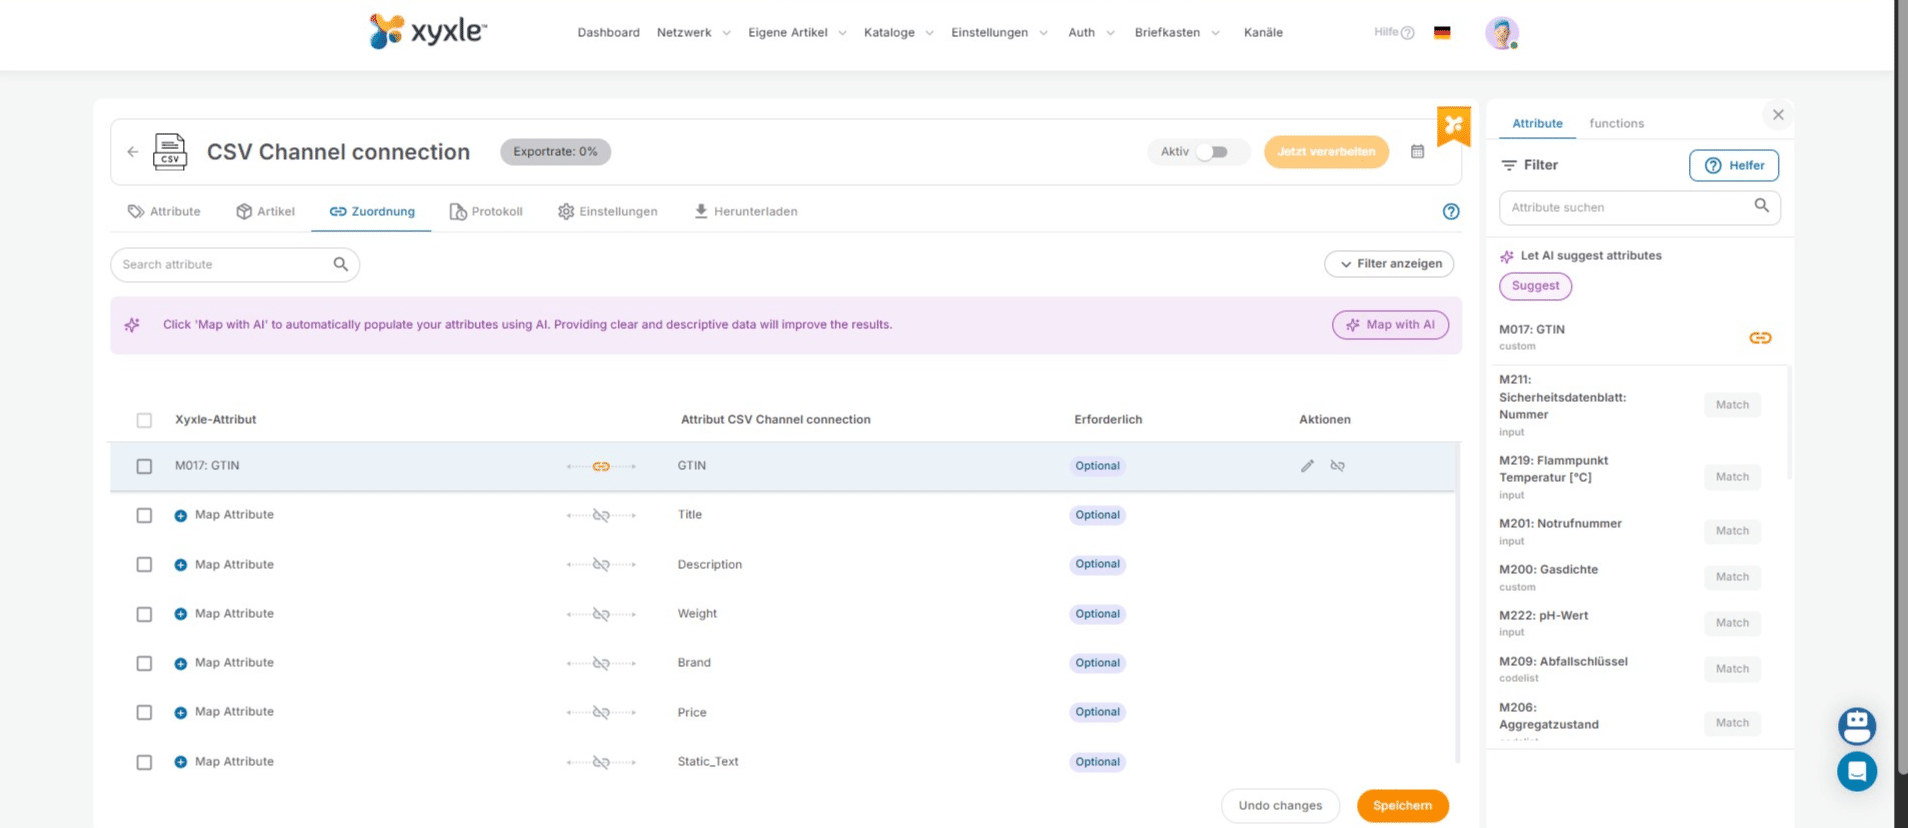
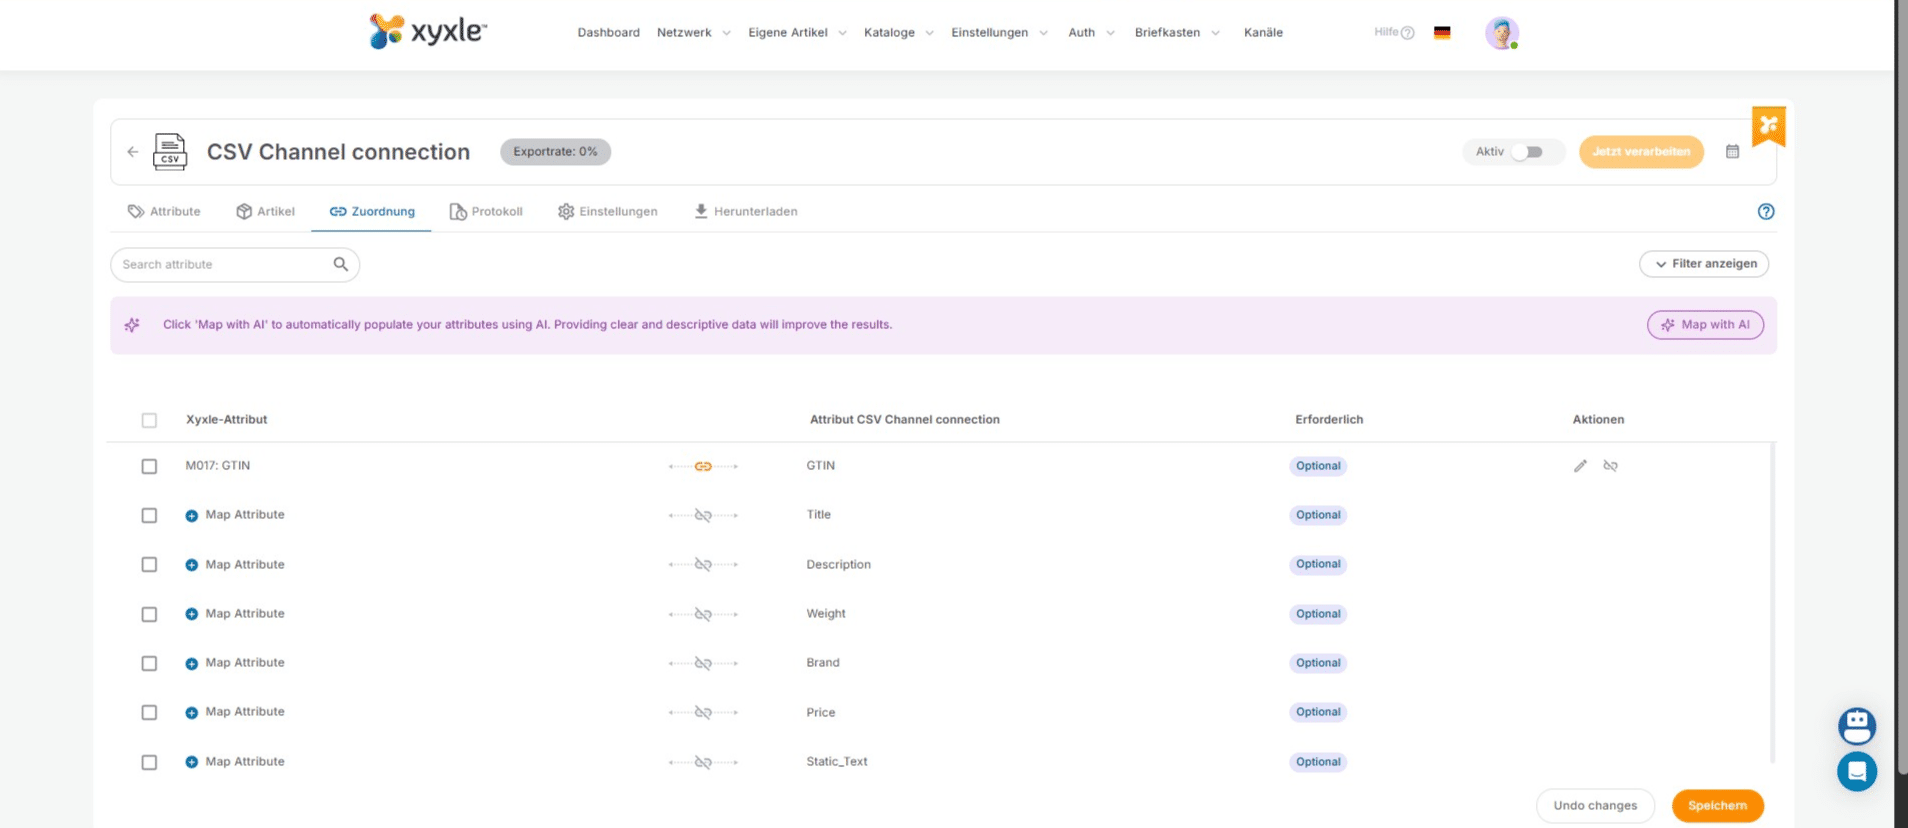
Click this icon to mapp your attributes with AI.
Click here to accept the selection if this fits your needs.
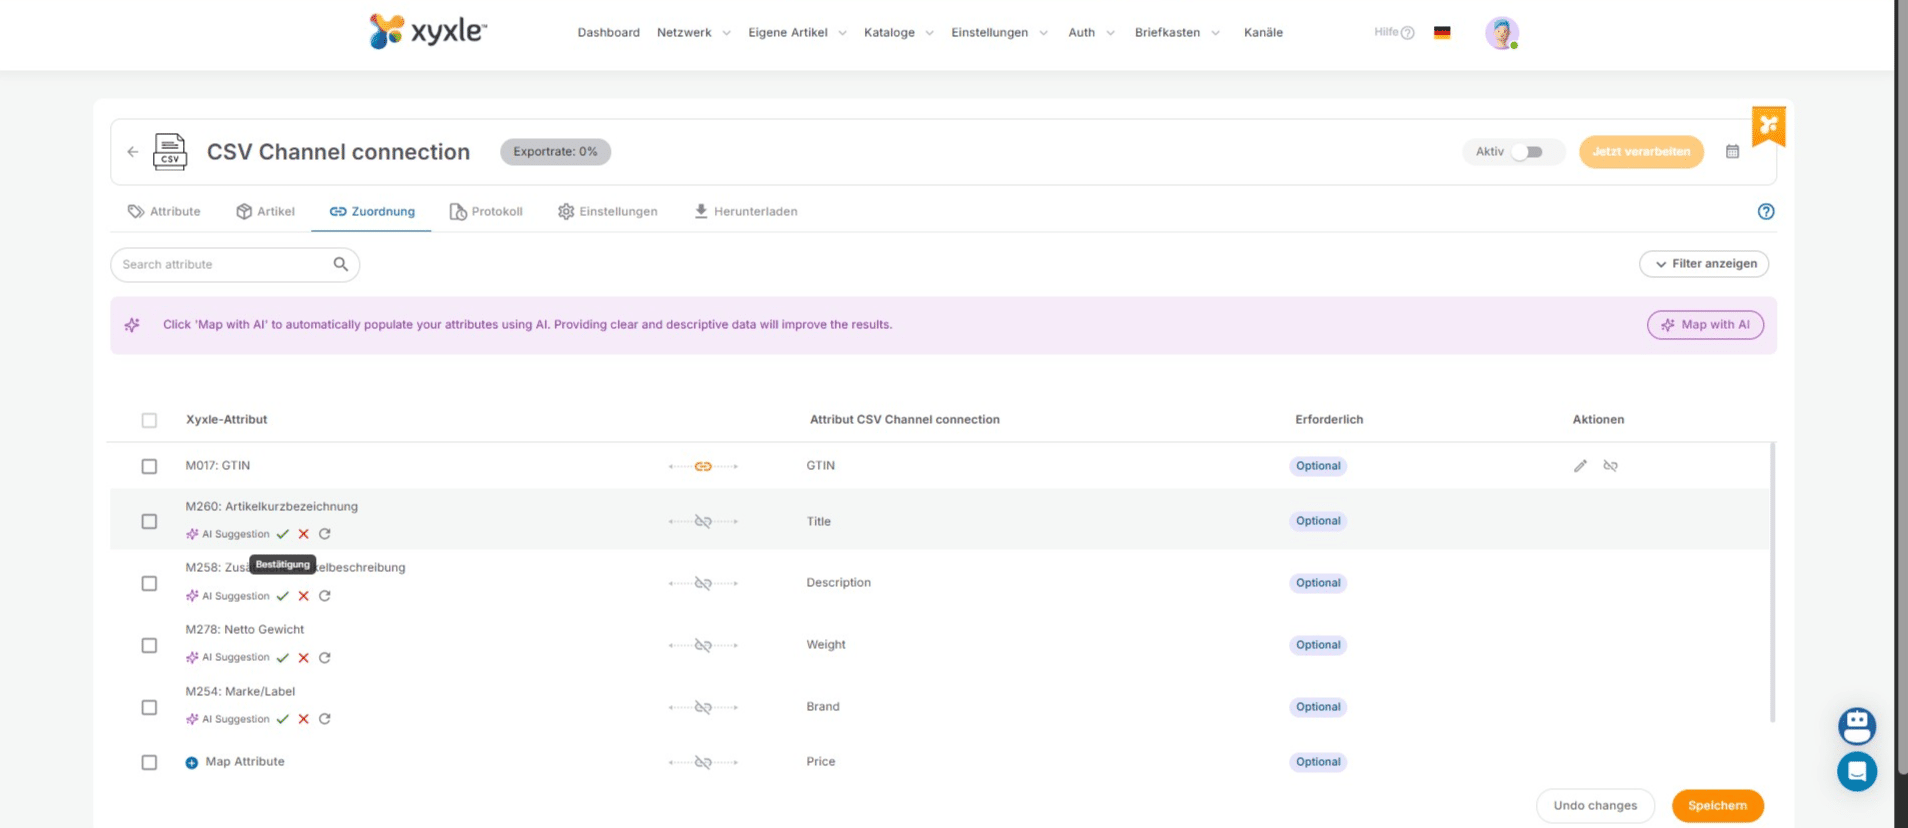
Click also here to accept.
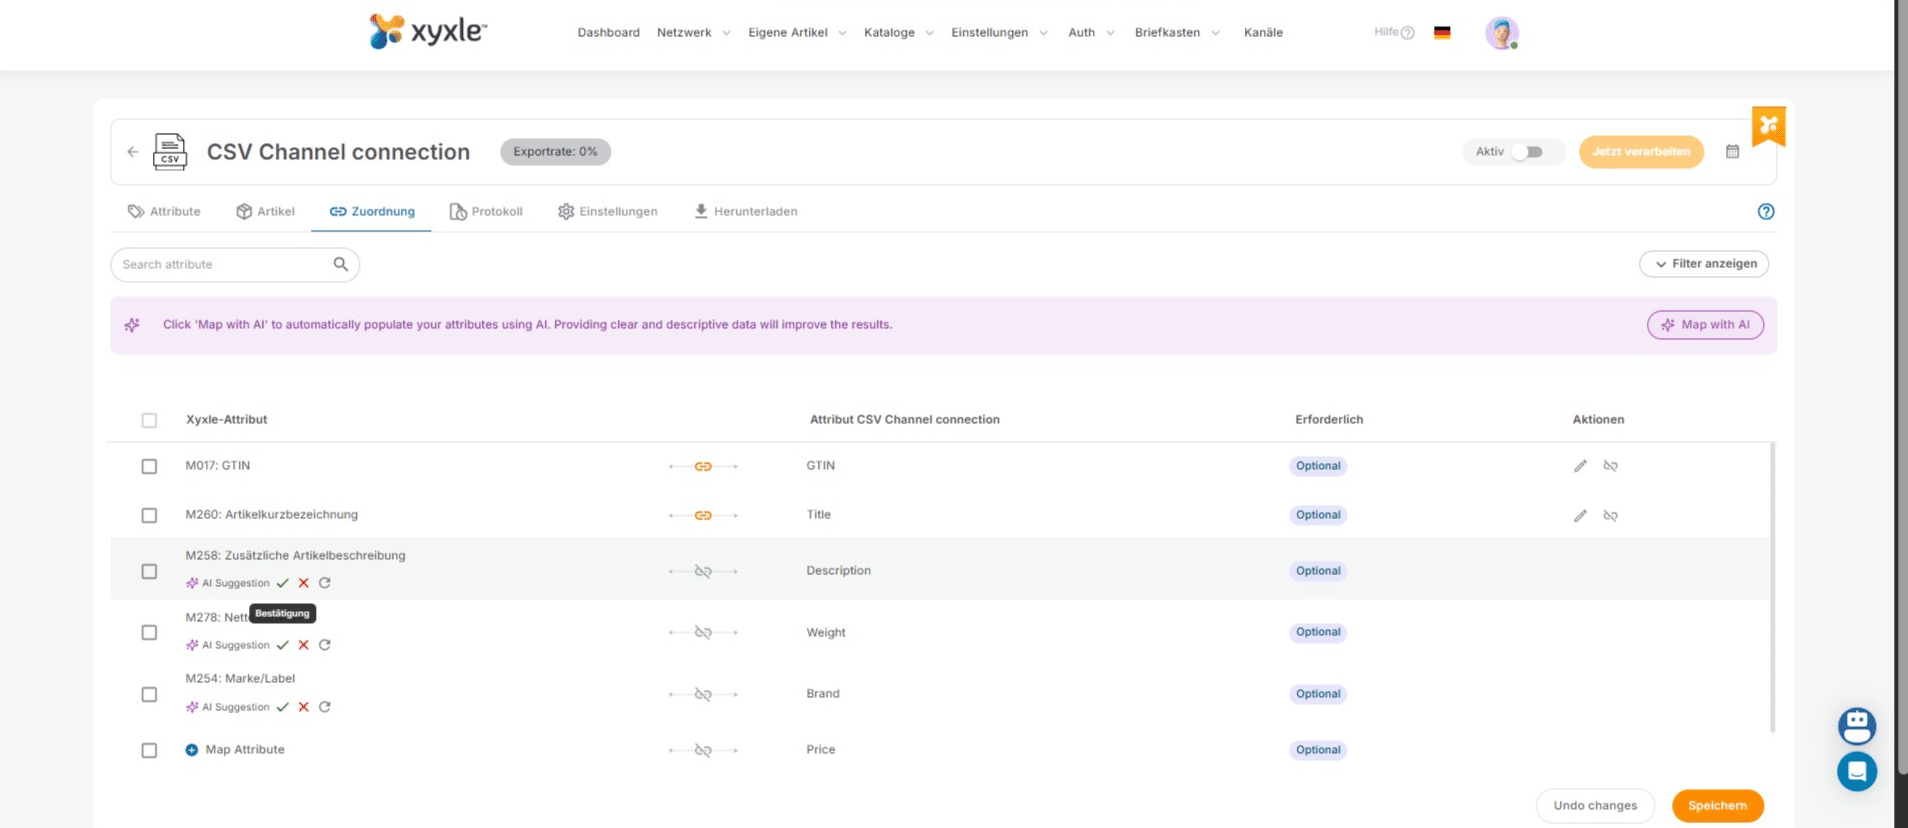
Click also here to accept.
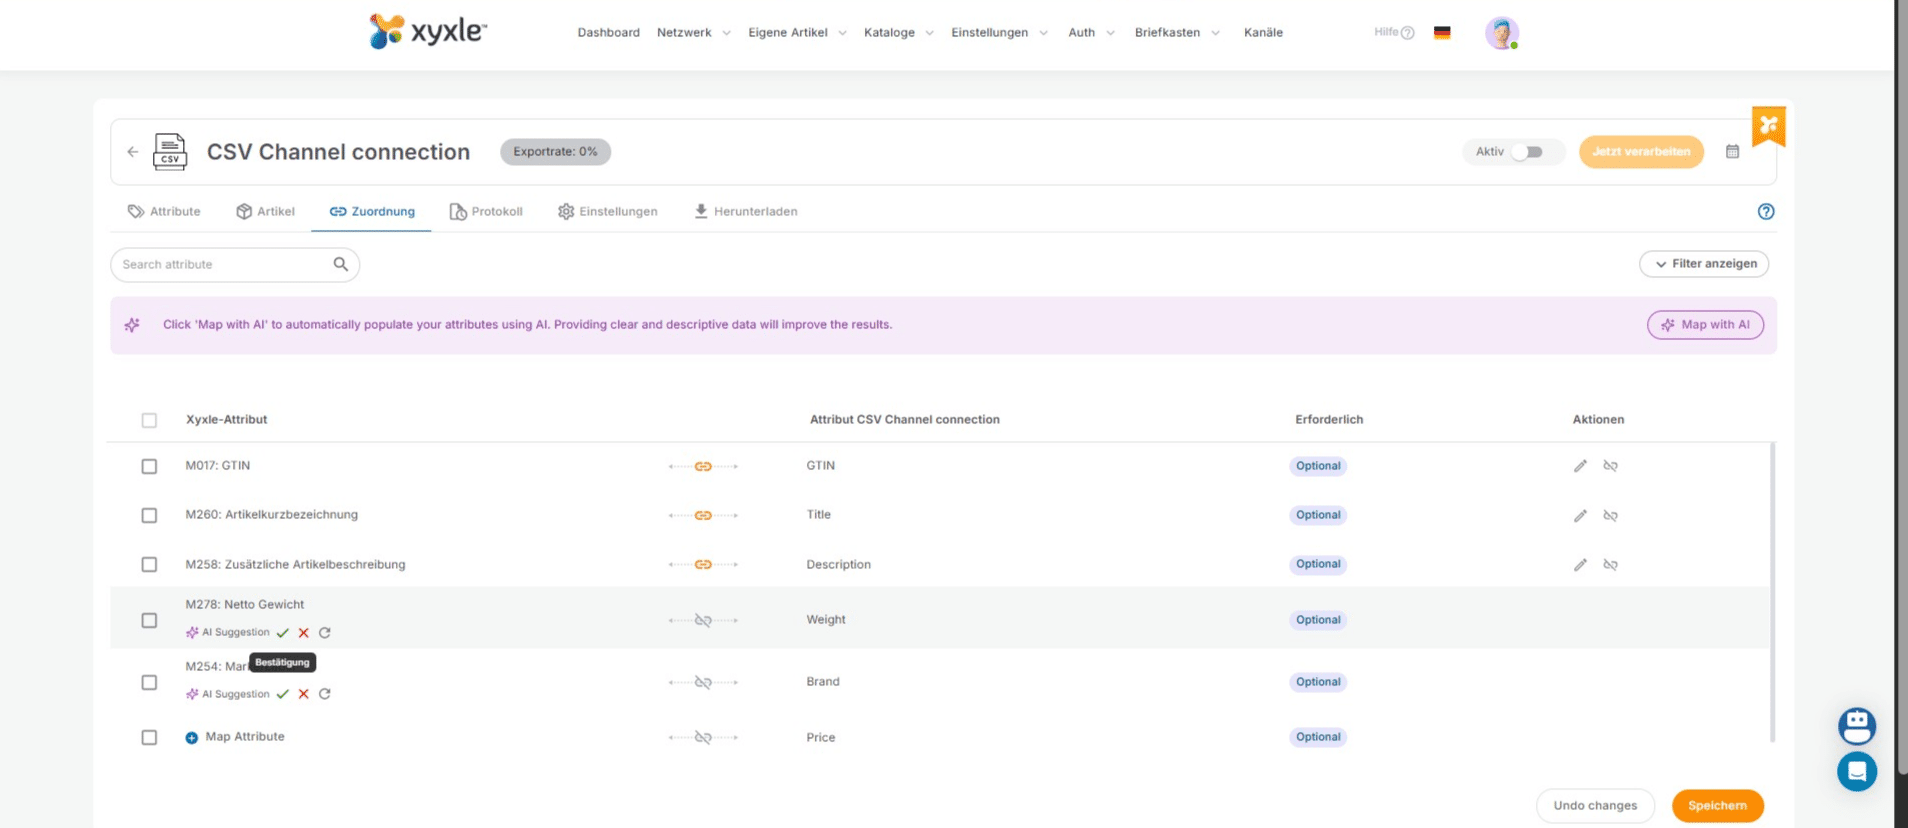
Click also here to accept.
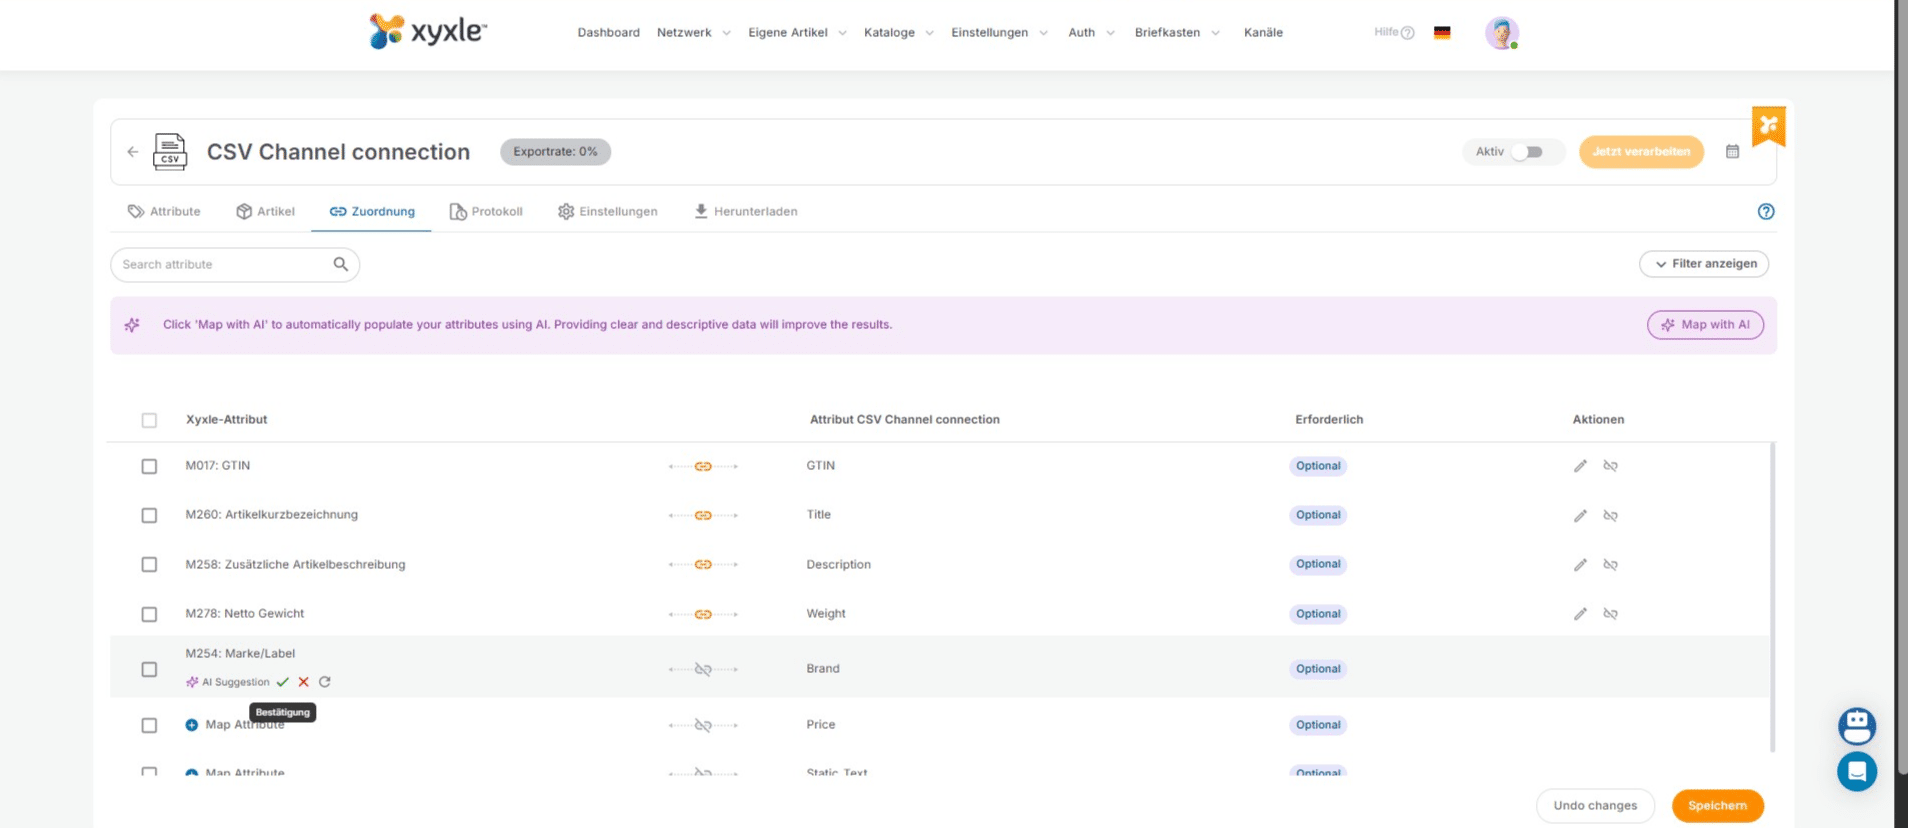
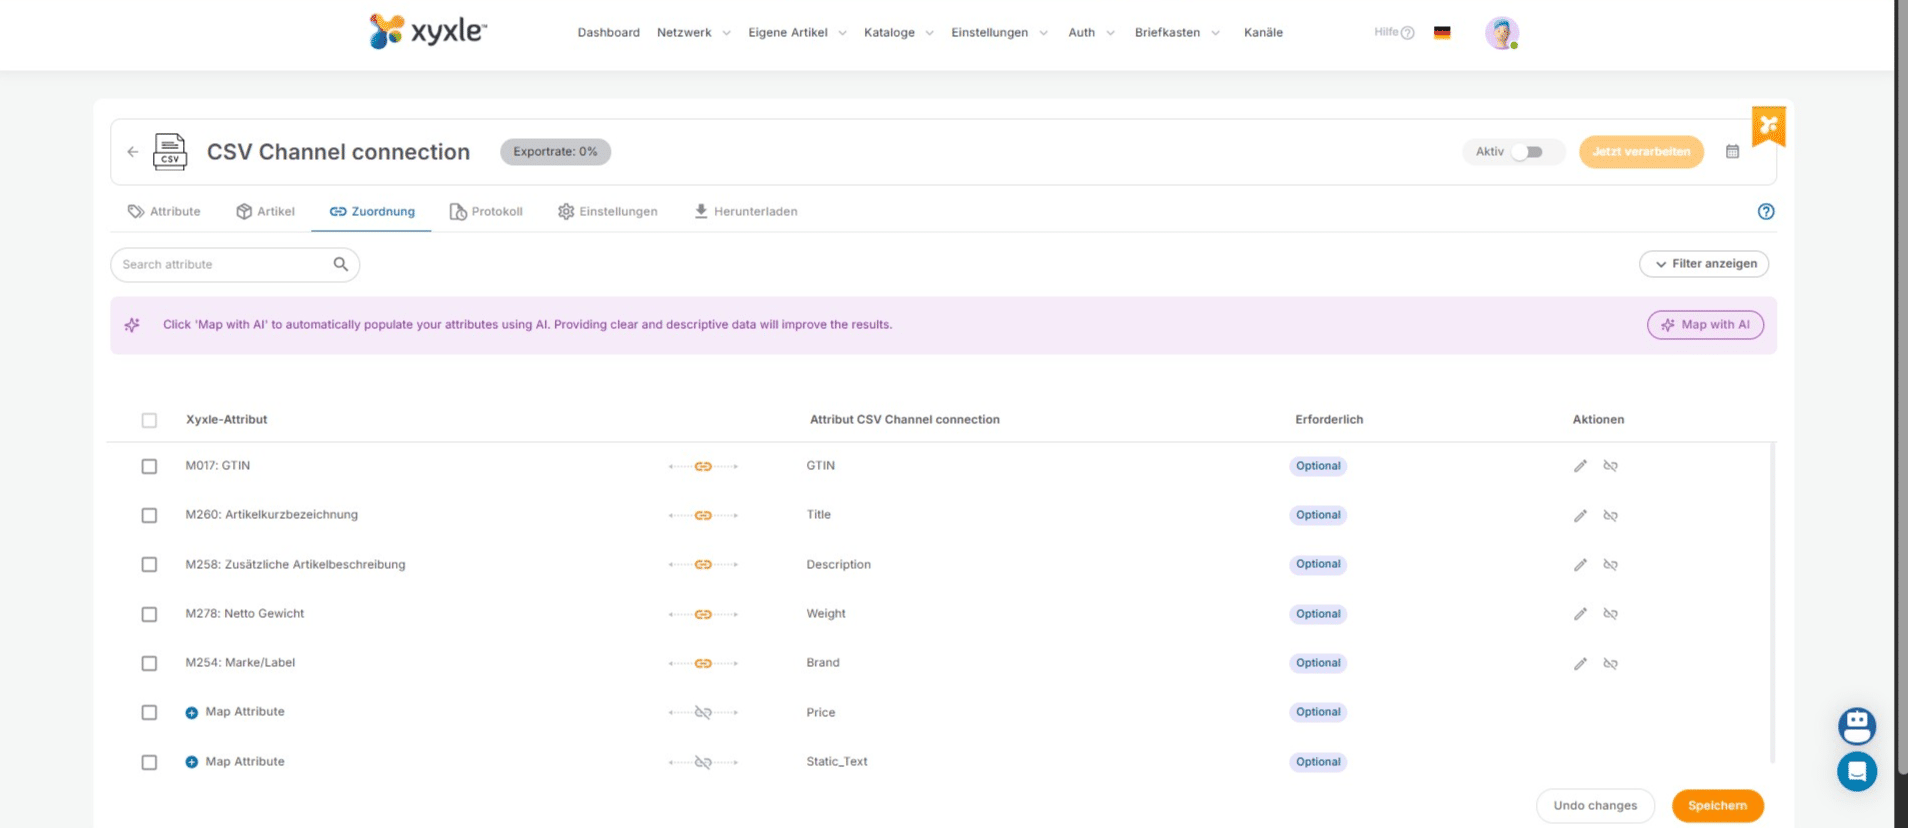
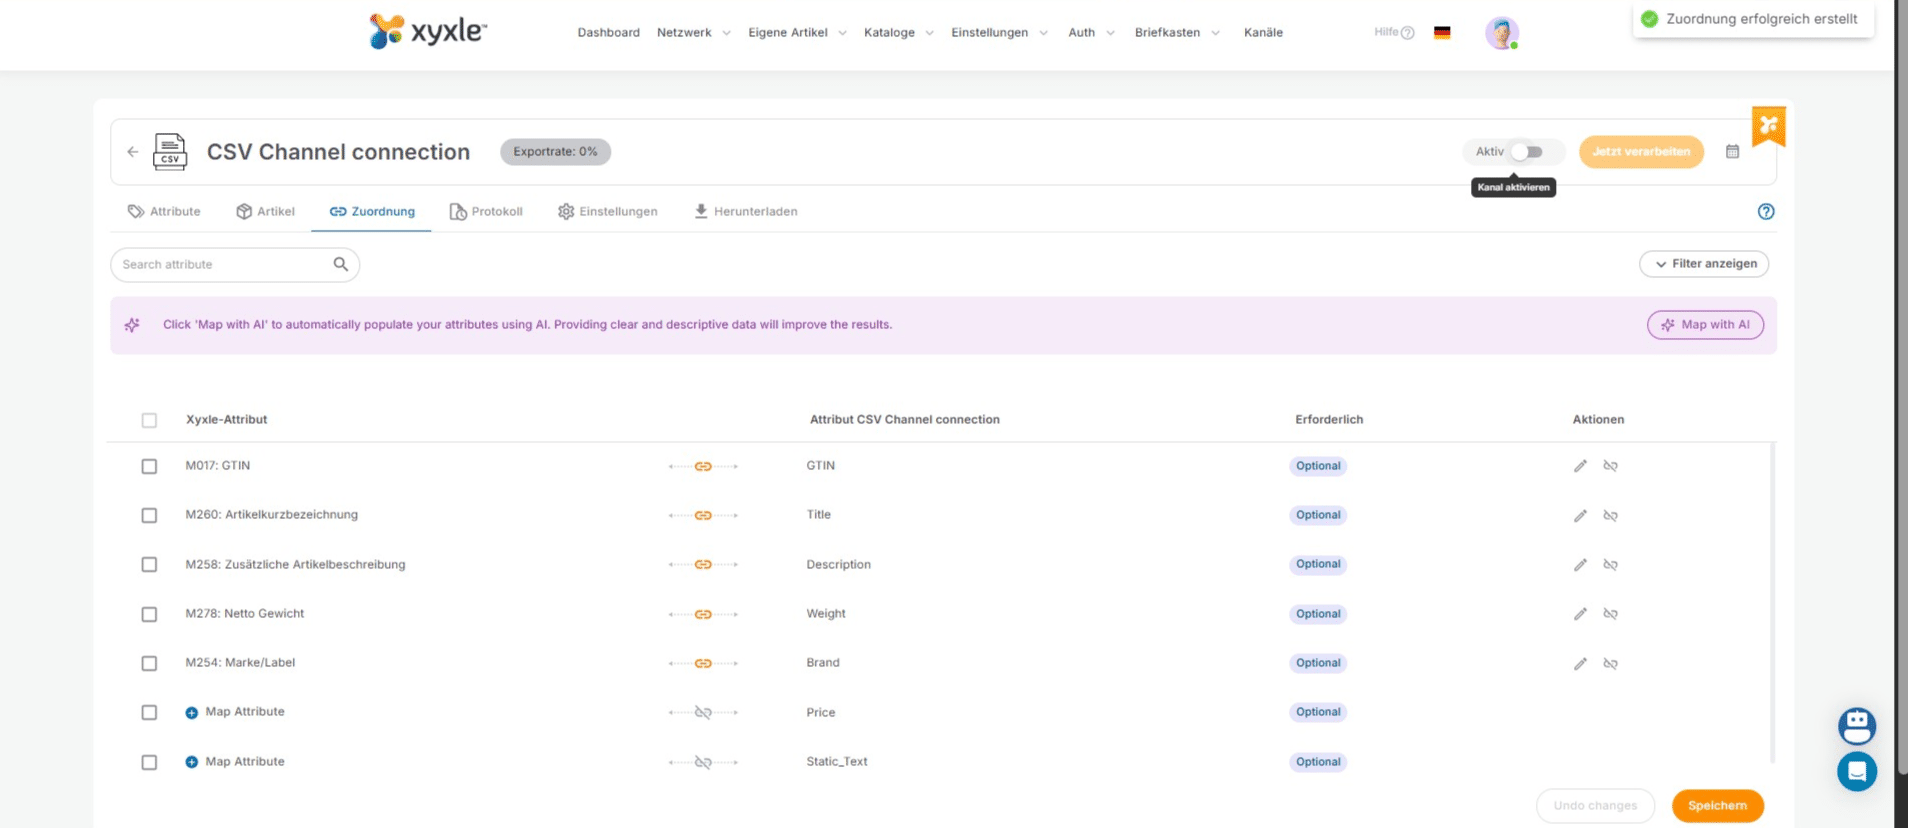
Click on "Speichern" when you are ready. As you can see we have 2 empty attributes which have not been mapped.
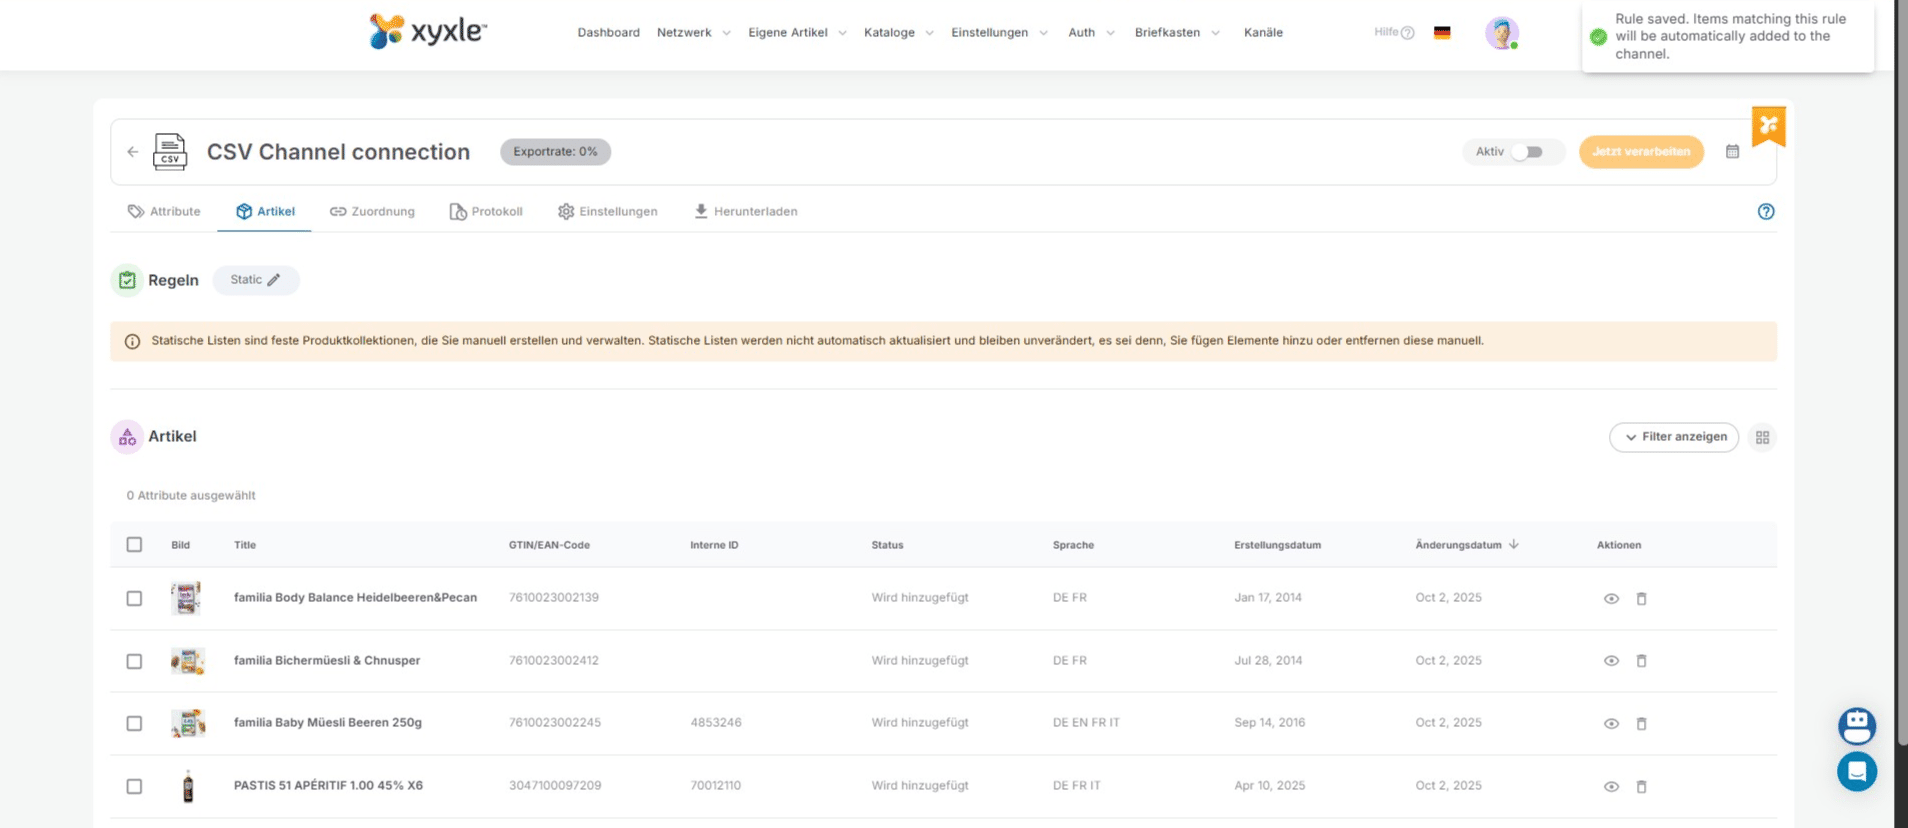
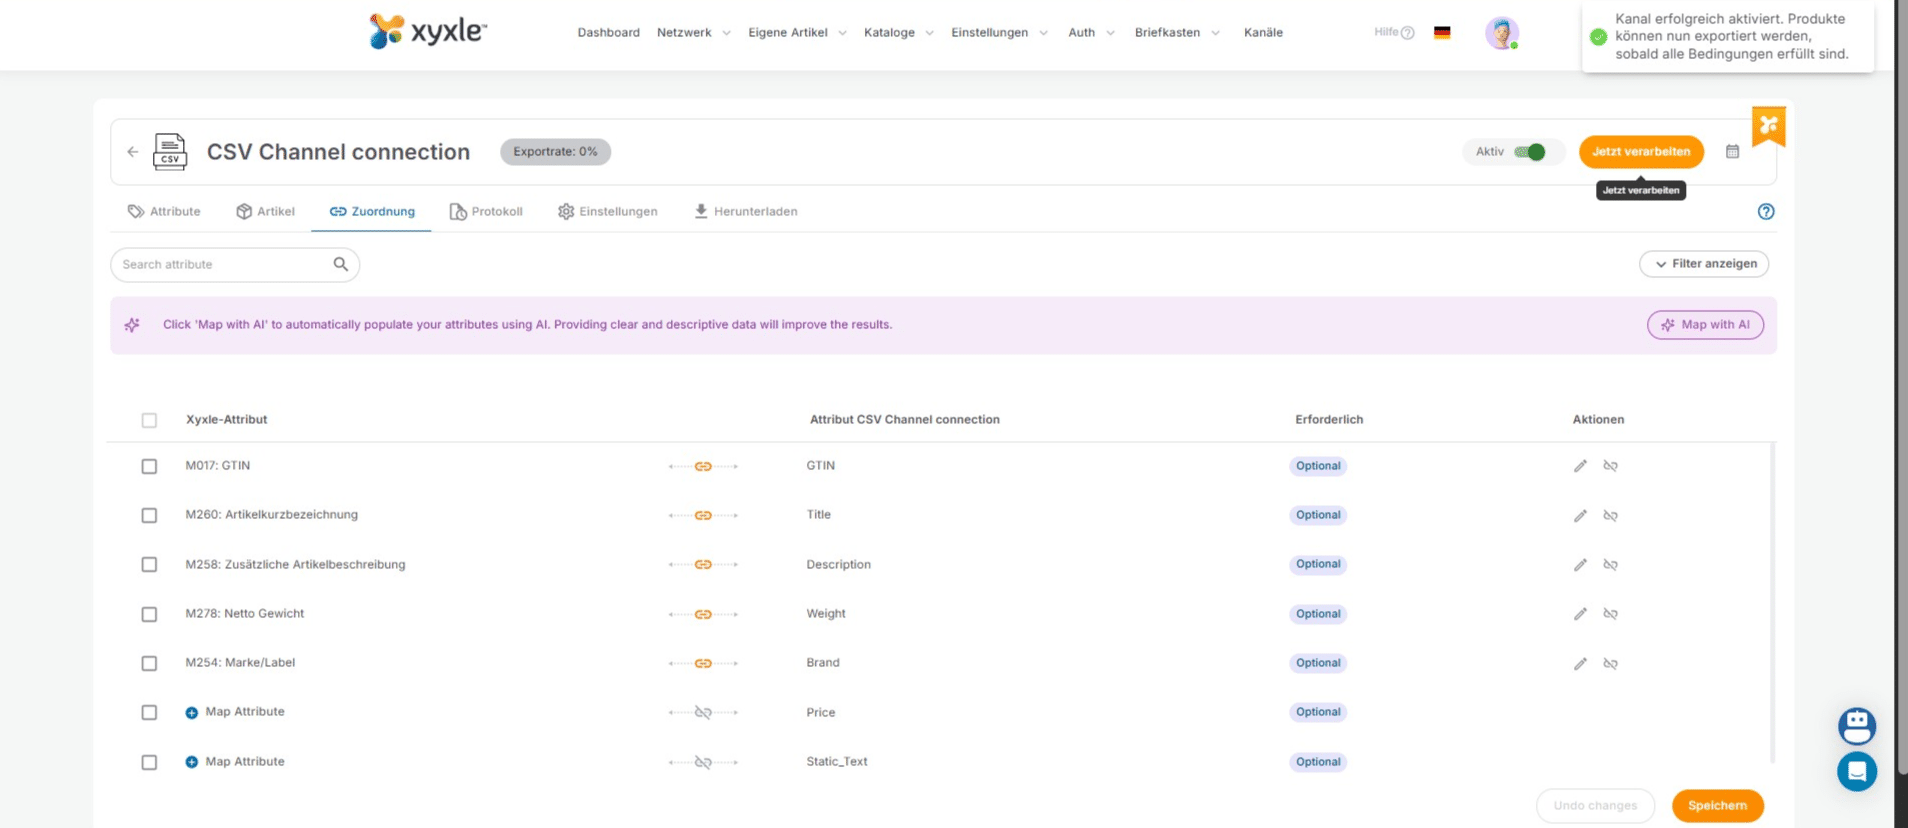
Click here to activate the channel.
Click on "Bestätigung"

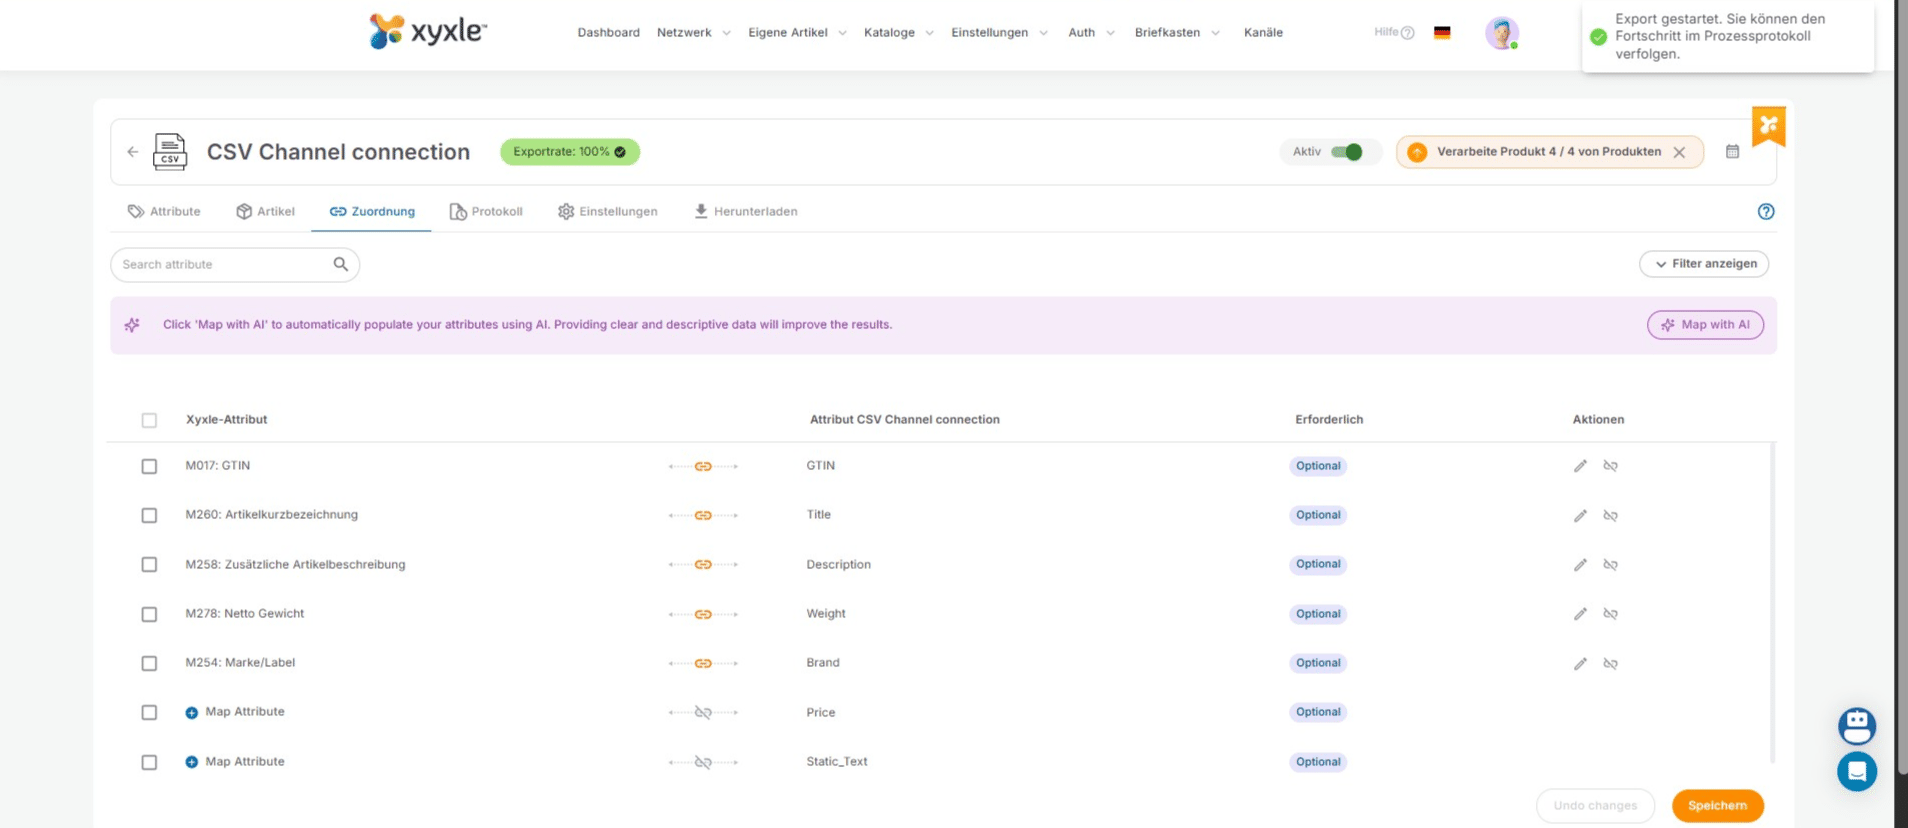
Click on "Jetzt verarbeiten" to process this CSV channel.
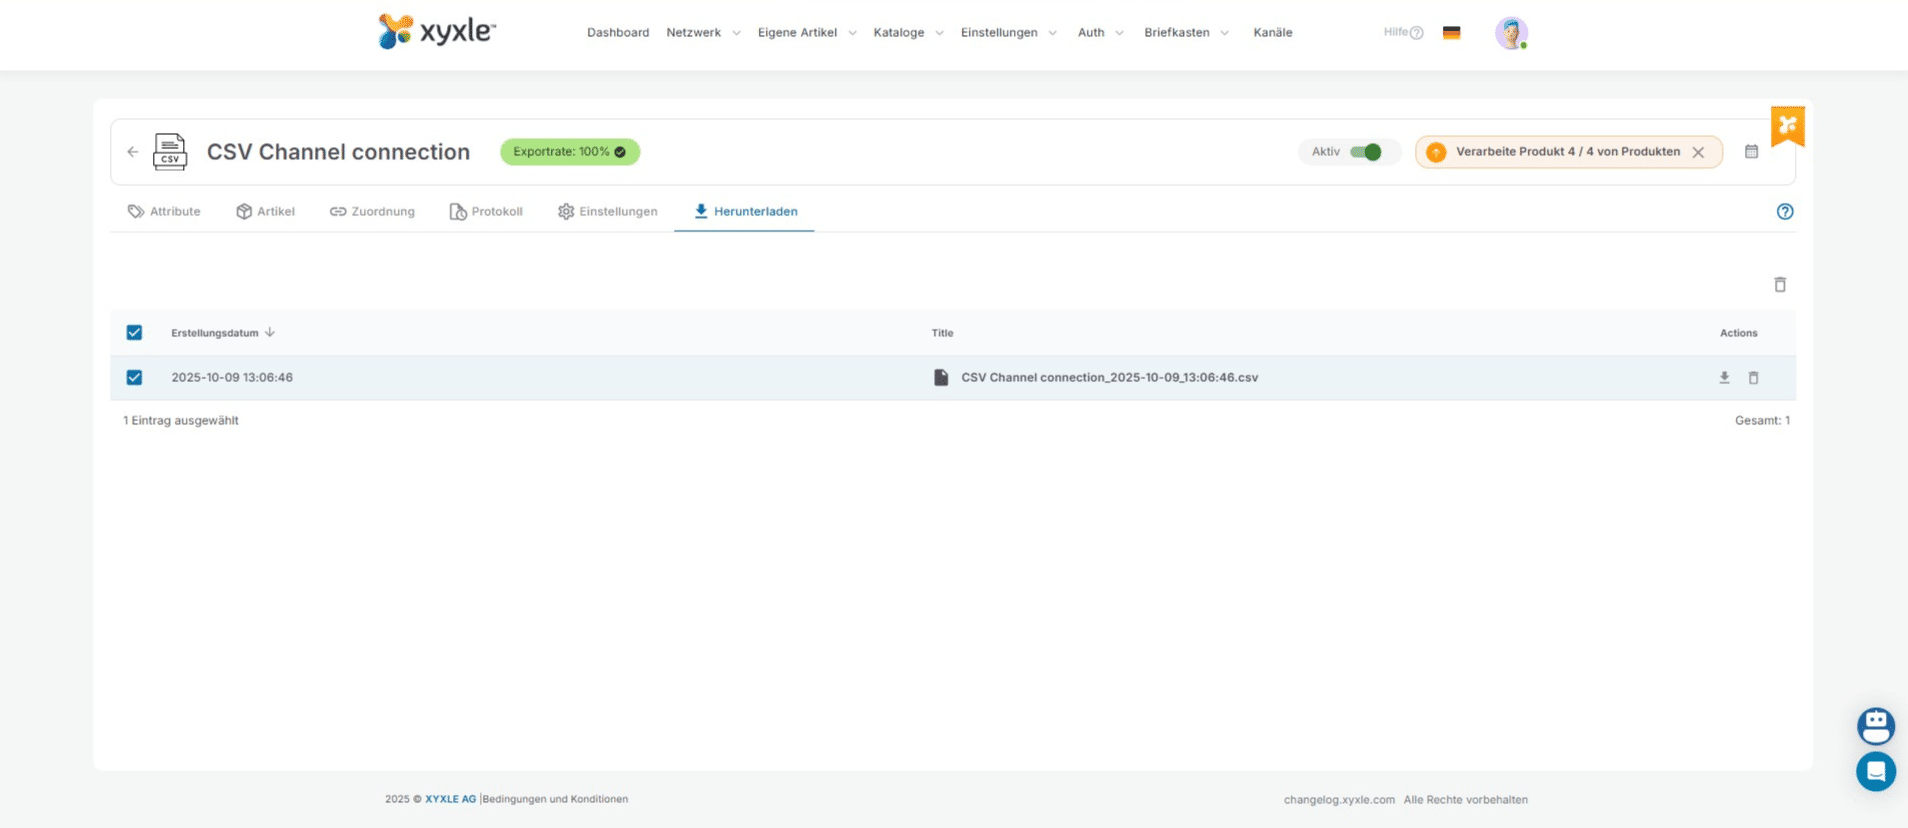
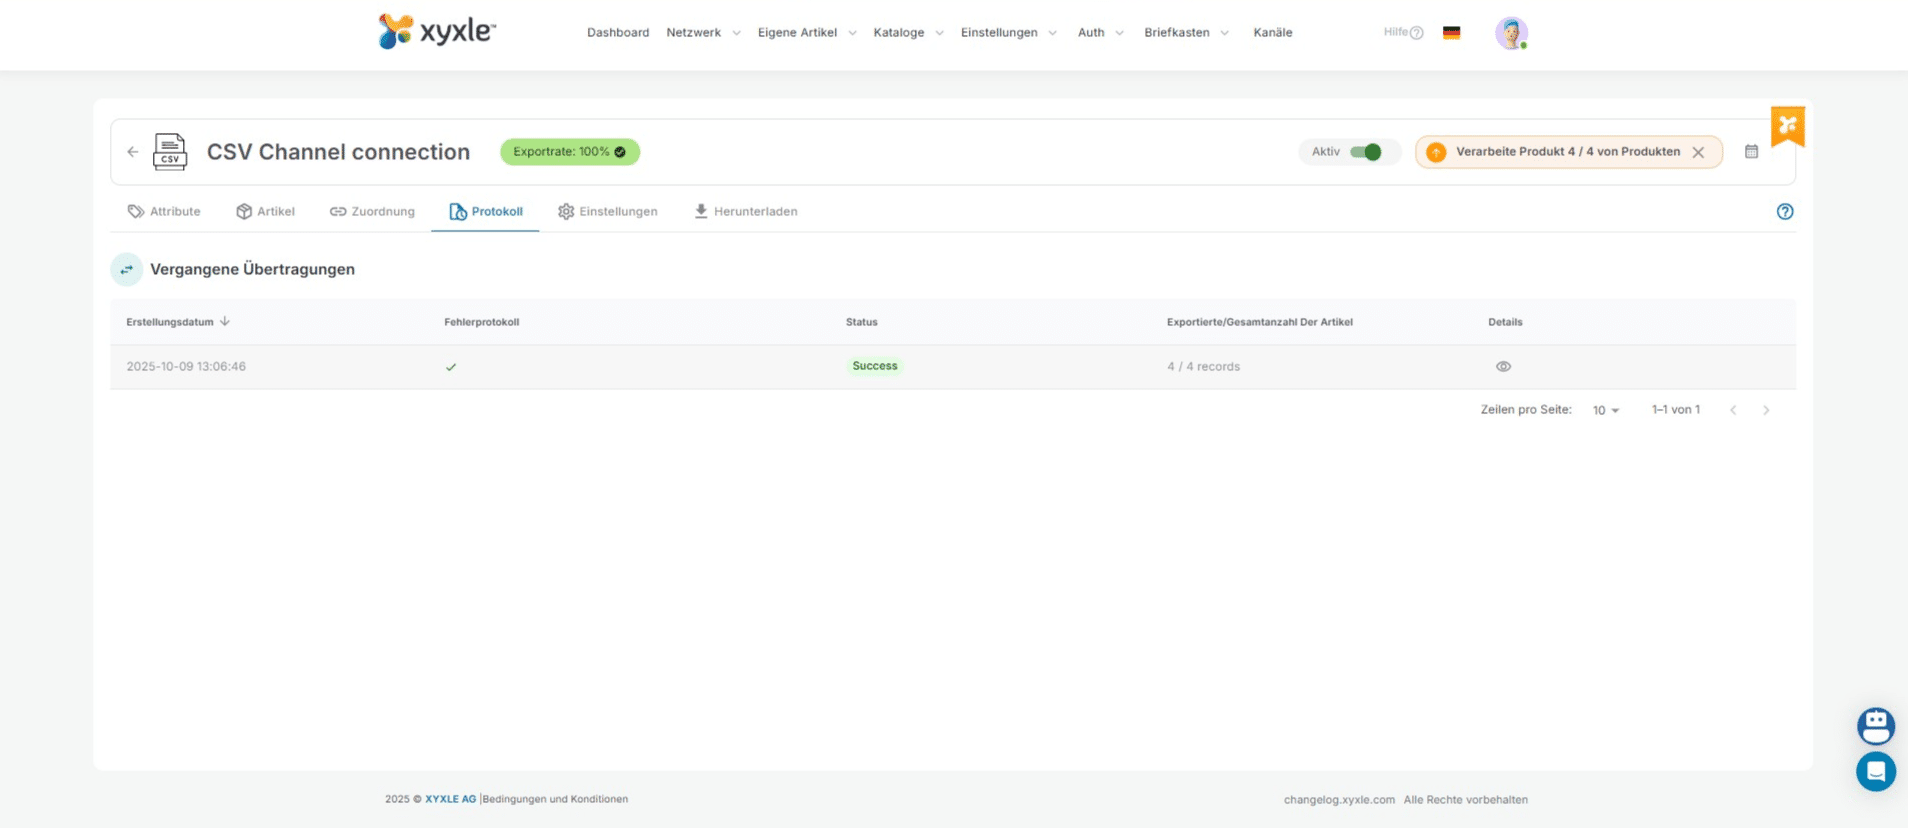
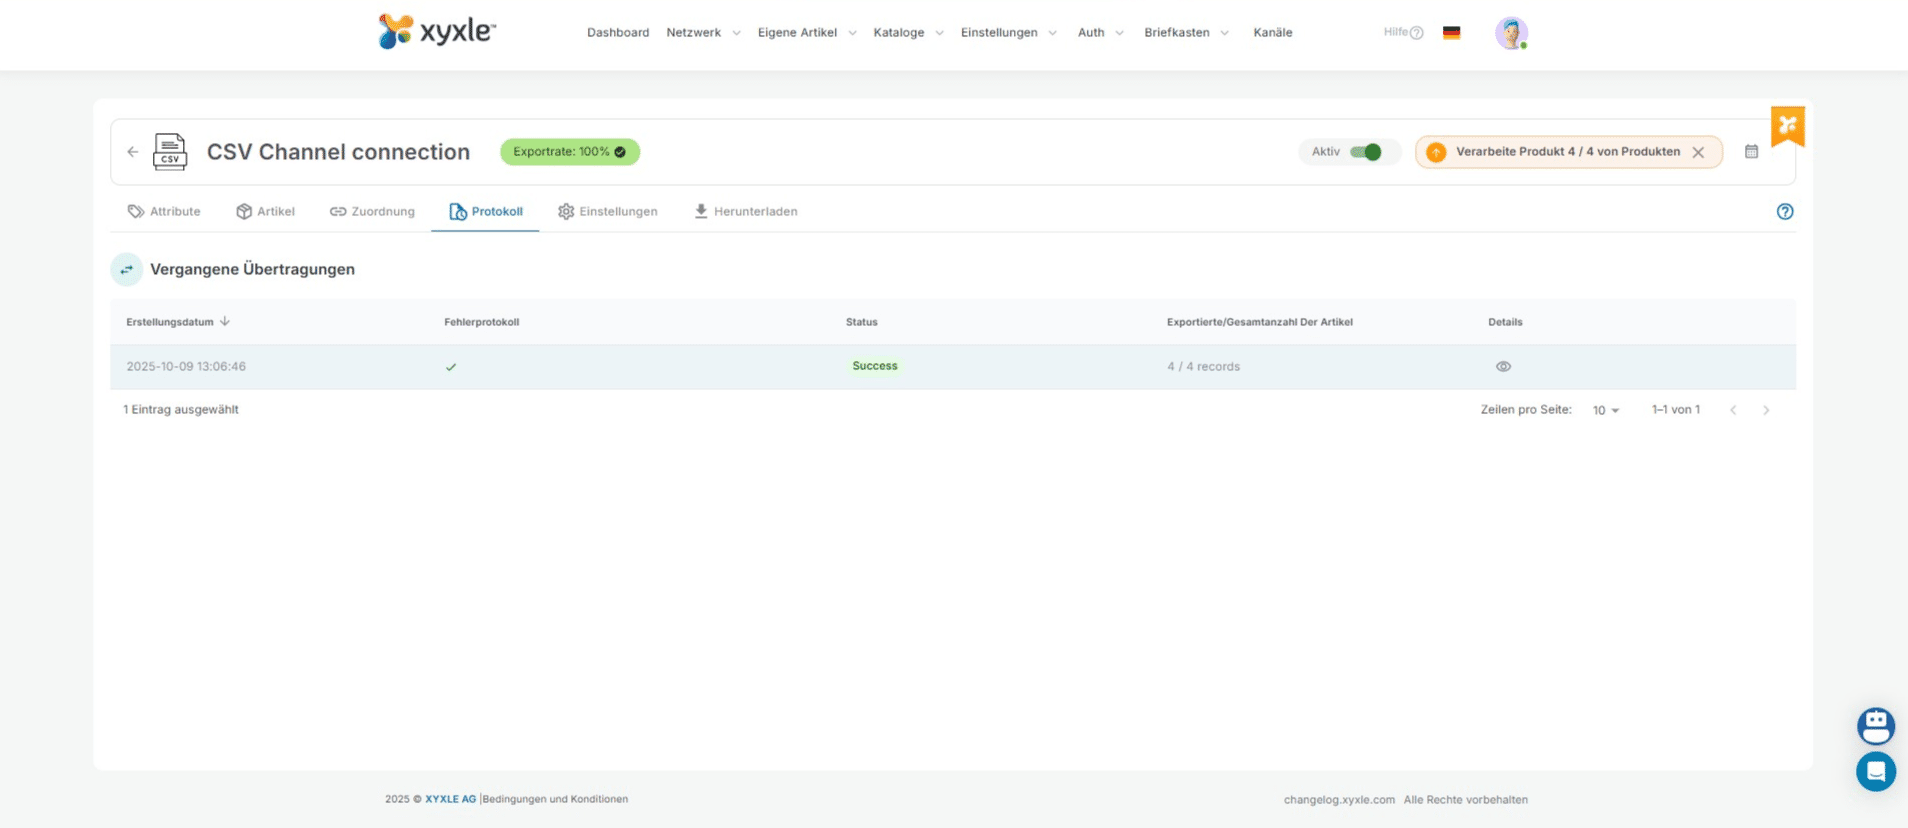
Click this icon to go to Product logs.
We can see our CSV File has been exported succesfully, without errors.
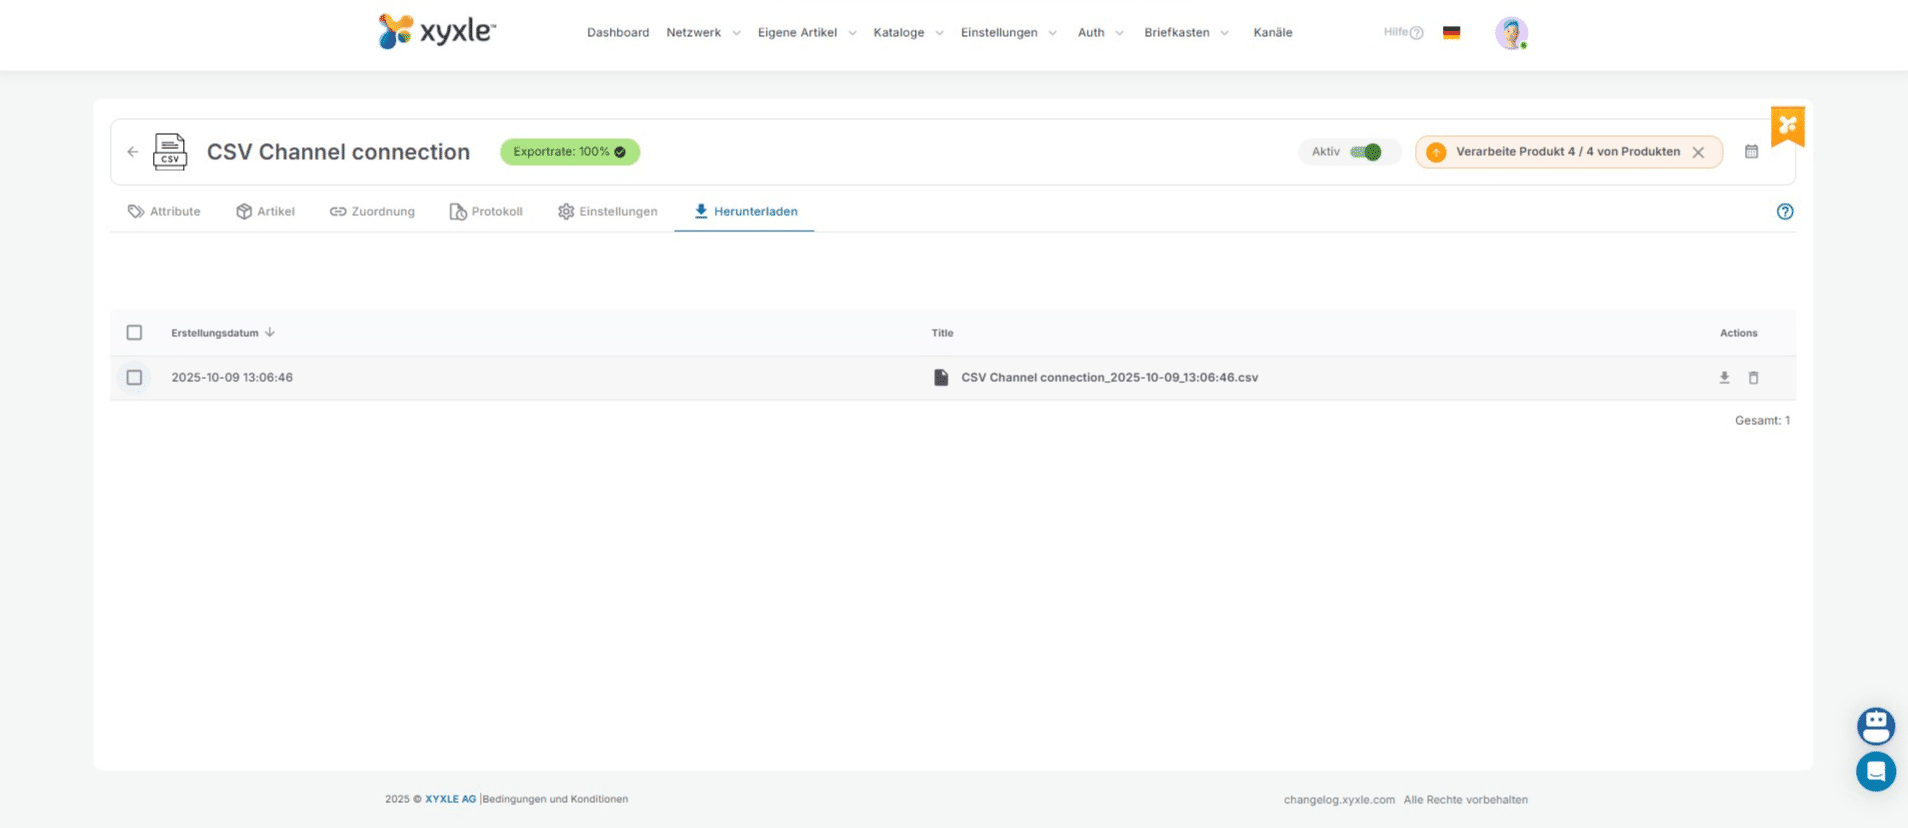
Click this icon to go to the download page.
Click here to select the CSV file.
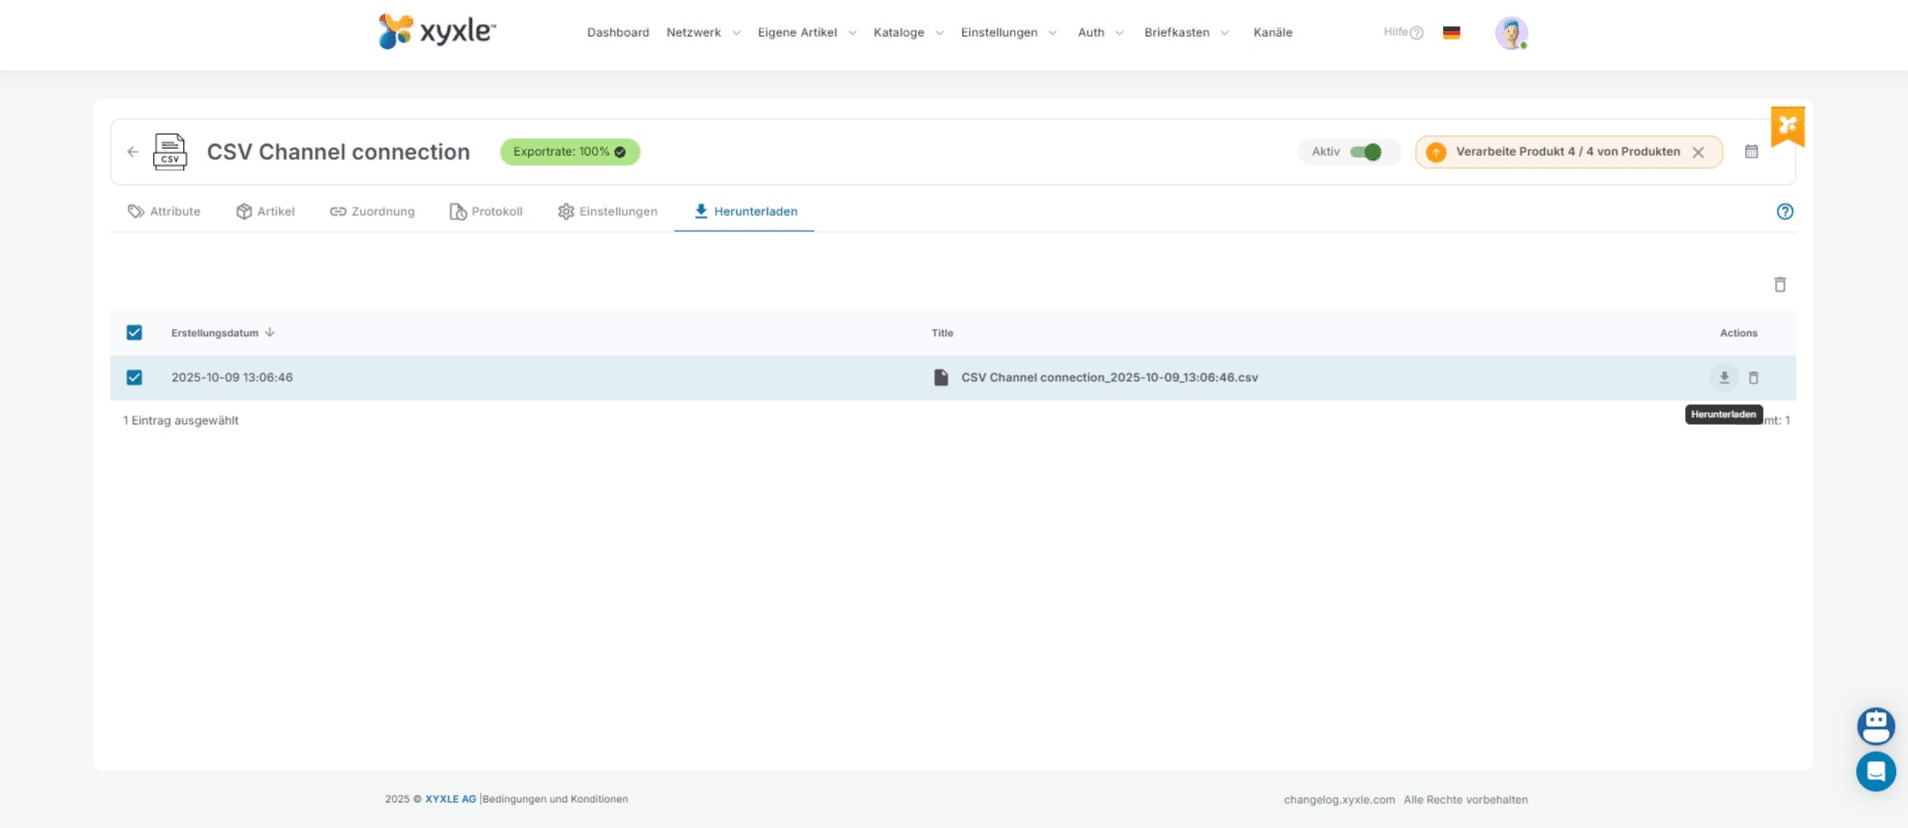
Click here to download the CSV file.
Done 🚀